 | |||
|
 |
|
 | |
|
 |
|
 |
|

| |||
|
|
|
| |
|
|
|
|
|
 | |||
| When I saw this photo of the border for this quilt, I began to feel unsettled. I thought if I just quilt it, it will look fine, but my uneasiness about it persisted. It's just too much blue. |
 |
| Today I spread out the quilt top and went to get my camera and of course when I got back -- there's that little Anpan (my daughter named her that-- it means red bean paste in Japanese) |
 |
| So I thought, maybe if I add the 4 patches of the 5 inch squares, leaving some blue.... |
 |
| Or maybe put a row of the 5 inch blocks between 2 strips of blue? Or maybe I need to get rid of the blue altogether---Decisions, decisions.... |
 |
| The little black crow block all sewed into its new home - a project to be unveiled in the "Quilts in the Pumpkin Patch" blog hop! |
 |
| Can you find the little crow in the back stitching? |
 |
| Two years ago I tried piecing a crow quilt block-- the one on the left. He's kind of a hunch back crow. Yesterday I pieced the black crow block and it's better (I even put it in a project which I'll show you later) but I plan to improve upon it when I make future crow blocks. |
 | |||
| I have been busily sewing for my "Quilts in the Pumpkin Patch" blog hop coming up on Sept. 19th. I reached over for a straight pin and this is what I saw. (Sorry it's out of focus, but you get the idea.) I thought to myself, "surely, I should make myself a cute pin cushion!" So all other projects in progress came to a grinding halt! |
 |
| I looked around for something cute I could make a pin cushion from. |
 |
| Then I saw these leaf shaped pieces which I've kept even though I couldn't think what to do with them. A thought started formulating in my brain. |
 | ||||
| (The leaf shapes were cut from these blocks which then I subsequently sewed bigger colorful half leaf shapes in. This would be another good project to finish since it's almost fall again. ) |
 |
| Have you seen these beautiful hand blown pumpkins? My neighbor had bought a beautiful orange hand blown pumpkin right from the artist herself. I wanted an orange one too, but had to think about it a lot because they were very expensive. Finally, I went to the artist's home, but it was late in the season and so there weren't too many left to choose from. I got this green one and have dearly loved it ever since. It's even prettier in person. (I got the orange one later on from Michael's or somewhere, and it's pretty too but not quite as delicate and lovely.) |
 |
| So I took 8 of those leaf shapes and sewed them together and added a stem and then filled it with some scrap batting and some rice. I added an orange bow and stuck in some pins. Then I thought, "this really fits in with my current sewing and I printed out my Quilts in the Pumpkin patch button and pinned it on!" I'm so glad to have a cute pin cushion! AND I'm so glad I didn't throw those leaf shapes away! (Being frugal sometimes pays off if you can just keep all that stuff organized and somewhere where you can find it when you want it.) |
 |
| I'm so excited about my Quilts in the Pumpkin Patch blog hop that I've been sewing all sorts of fall projects. I really need to wait before showing you my projects but thought I could put up some sneak peaks! |
 |
| I have a tendency to be |
 |
| All Autumn Fabrics ready to sew! Do you buy fabrics at the end of the season on sale? I have quite a few! |
 |
| Do you see my "Quilts in the Pumpkin Patch" button? |

 |
| I have really been enjoying sewing these little bags. I sorted all my scraps by color and have them all wrapped individually for easy access. |
 |
| The Pink and the primary colors bags are the newest ones. |
 |
| I bought a big bag of colorful buttons at JoAnne's. |
 |
| I dusted my shelves and made a display. |
 |
| I put some fall fabrics in this basket because I'm gearing up for my Quilts in the Pumpkin Patch Blog Hop. I hope you'll stop by September 19th- 26th! |
 |
| Happy Quilting! |
.jpg)
 |
| This is another little friendship bag only this time I added a latch (is it a latch?) and a button. Also, I did straight line quilting so you could see that it's just as cute as free motion quilting! The latch thingy was left over after I made one long handle and then cut off the two 10 inch pieces and there was about 6 inches left and I just folded it and sewed across the triangle part (just under the cat's chin) and sewed it in along with the handles. If you didn't see my other friendship bag post, the tutorial is at psiquilt and here is the link: http://www.psiquilt.com/2009/08/friendship-bag-tutorial.html (also reminder, I made my handles 3 3/4" wide instead of 2 1/4" as Rachel does in her tutorial. |
 |
Mug Rug Tutorial
1. Sew seven 3 1/2 inch blocks together in the configuration above.
2. Lay a piece of batting down, lay the backing on top of the batting -- right side up
3. Lay the pieced mug rug down in the backing with the right sides together.
4. Sew all around, leaving a 3 inch opening to pull the right sides back out.
5. Close the opening and then quilt it and top stitch 1/4 inch from the edges all the way around!
|
 |
| Then you can see that I've FMQ some little flowers and vines. |
 |
| It was pretty quick to make! |
 |
| I've never been that interested in sewing bags but after sewing the little darling bag yesterday (see previous post) other ideas started brewing. I worked on this prototype and want to do a tutorial soon. (I'm thinking a haunted house since October will be here before we know it!) |
 |
| This turned out pretty cute but the next one I make will be a little wider. You can see the little red house in the window reflection of the lower left window and I added the red dormer to the roof along with the red shutters to match that little red house. |
 |
| I free motion quilted snowflakes on the snowy roof and on the sky parts of the bag, although the fabric does have a stylized snow flake print already. |
 |
| It's lined with the scenic fabric |

 |
| I have all these buttons to choose from to use as a door knob. I'm leaning towards the heart or the yellow round button. The yellow star is not a button so I'd have to glue it on if I used it and don't know what kind of glue would be good. I like the tree but it's a little big and not door knobby at all (not that that really matters). |
 |
| I found the tutorial for this little friendship bag on Rachel Griffith's blog: psiquilt.com Here's a little tutorial here and you can check out hers. |
 |
| It's quite easy to make.
1. Cut:
16 strips of 5" x 1 1/2" all different fabrics (for the sides)
One 5" x 8 1/2" piece, which will be the bag bottom
One long strip of fabric 3 3/4" x 21" (handles)
2. Sew 8 strips together for each side and then sew the bag bottom piece between the two side strip pieces (see photo)
3. Handles (different from Rachel's): Fold long strip in half long ways and press and then fold each long edge to the center fold and press (the width is now about 7/8th inch) Insert a strip of batting inside and sew down the length 3 or 4 times (I saw this on the Missouri Star Quilting Co. tutorial -- three tote bags from one charm pack). You will cut this in half and trim to get your two 10 inch handles.
|
 |
| 4. Lay down the bag top on a piece of batting and quilt. I quilted a paisley design but you could sew straight lines and it would be just as cute! (See more recent posts for straight stitching photos.) 5. Use this quilted piece as a pattern and cut out your lining exactly the same size. 6. (Follow these instructions for the bag and then do the same thing to the lining) Sew the sides (right sides together) 7. "Box" the corners (please see Rachel's or the Missouri Star tutorial for this technique) of the bag and then also the lining. (You now have two separate bags, the tote and the lining) Unpick about 3 inches midway down the lining side seam. 8. Pin the handles onto the outside of the bag so the handles are going down and place this into the lining bag which should be inside out so the right sides are together. 9. Sew 1/4 inch around the top and I backstitch several times across the handles. 10. Turn right side out. Topstitch 1/4 inch around the bag top and sew the lining closed again. That's it! You're done! |
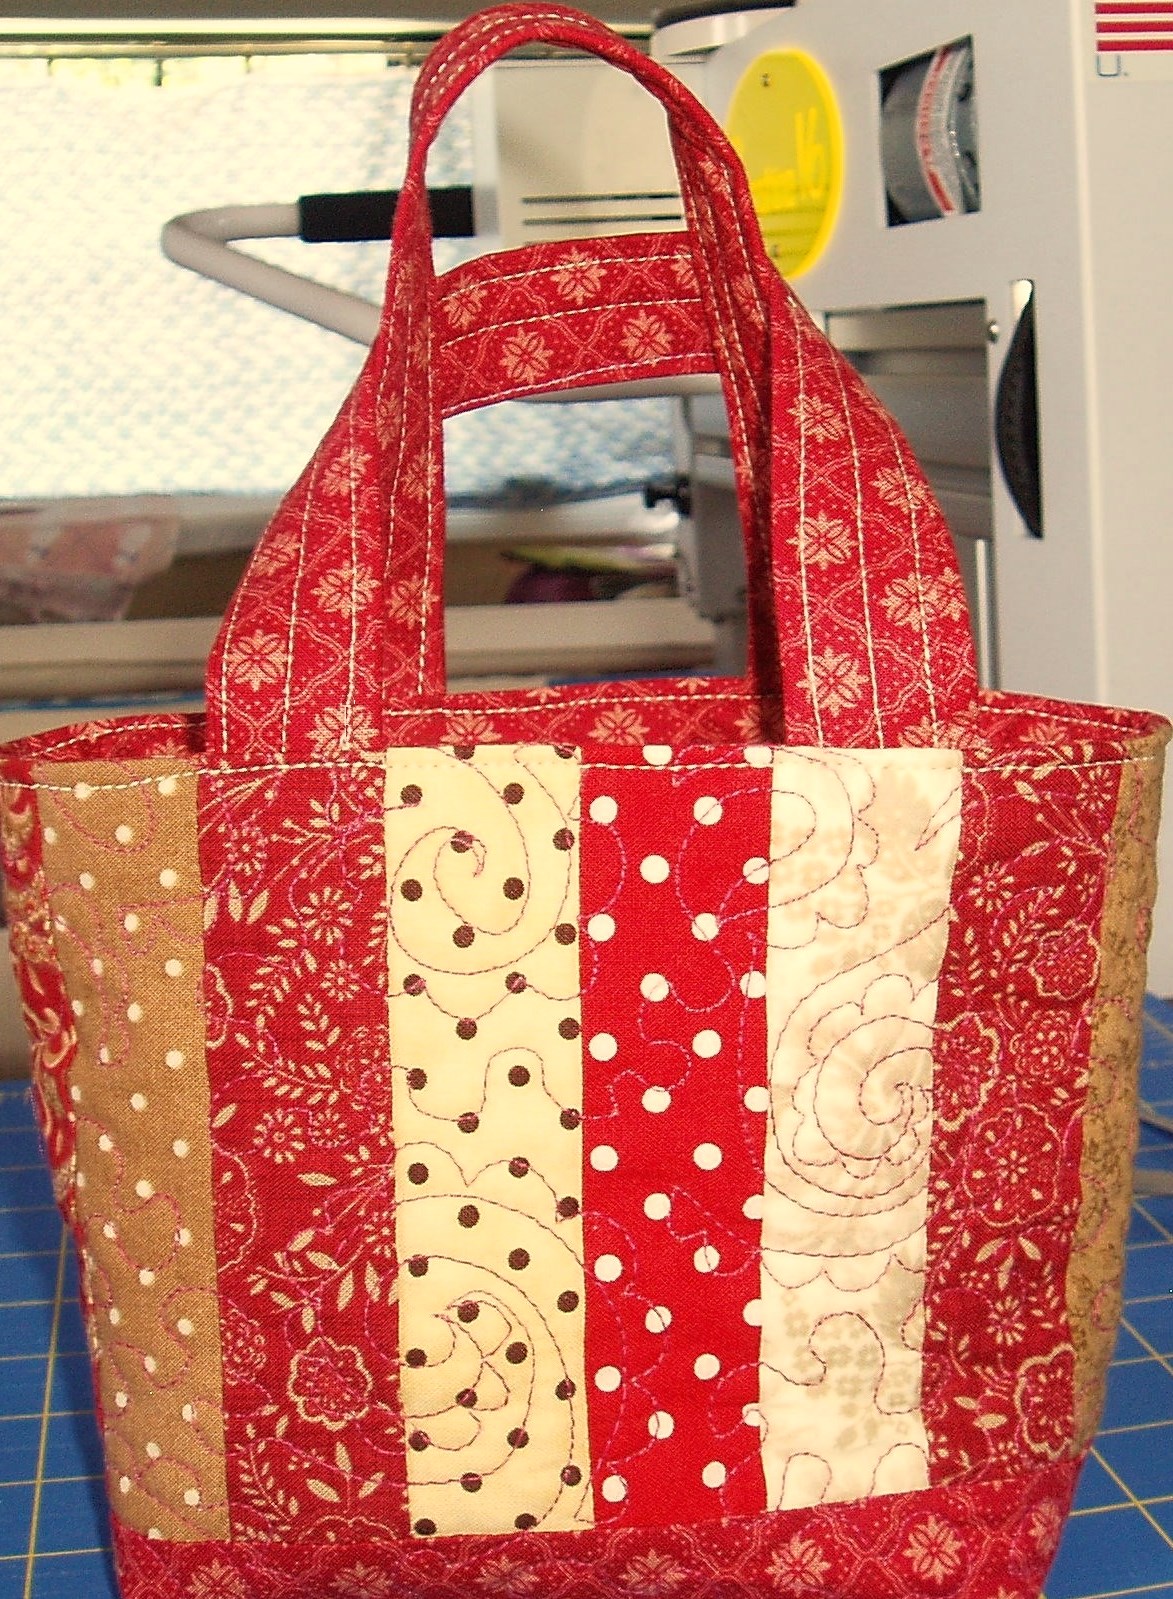 |
| I love Rachel's idea of putting in a couple of charm packs or fat quarters and some rick rack for a gift for quilty friends or anything else you might think of! Her tutorial is very thorough and you'll also love her southern accent! Because this is small, it's quick to make, you could use up scraps, and have the cutest little bags on hand for a quick gift! |
I've already packed up nearly all the Valentine's decor so wanted to finally get all my Valentine posts completed. I wanted a small...


