 |
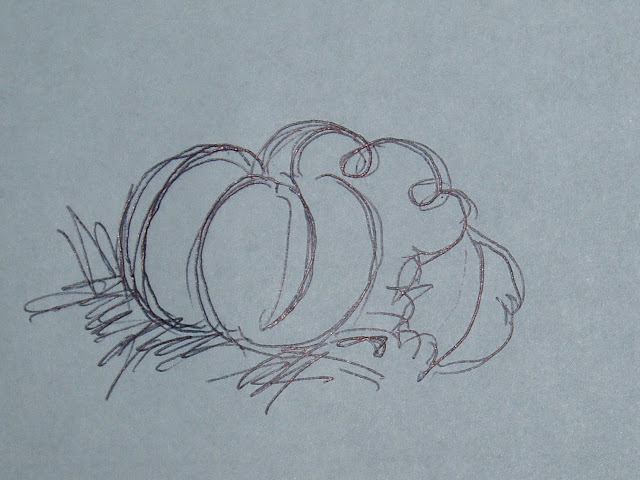
- Start with a simple drawing
- Scan it (save it in a file with your photos). Note how the background looks dark.
|
|
|
|
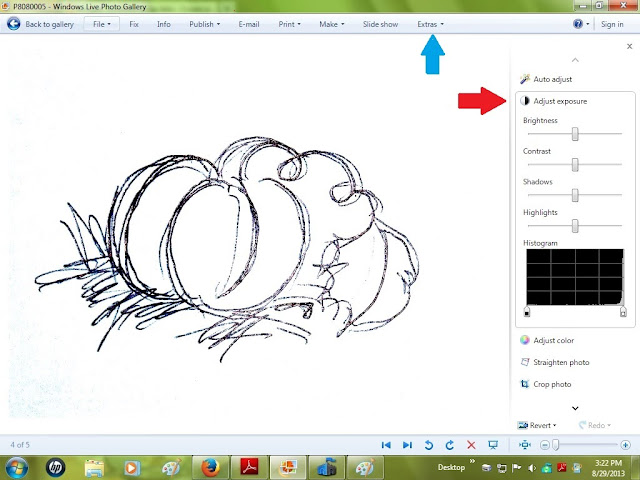 |
- Open the picture in a photo editing program. (I use Windows Live Photo Gallery, which either came
with my computer or maybe my printer)
- Adjust the exposure (see the red arrow) to make the background white. Play around with
Brightness, contrast, shadows, and highlights.
|
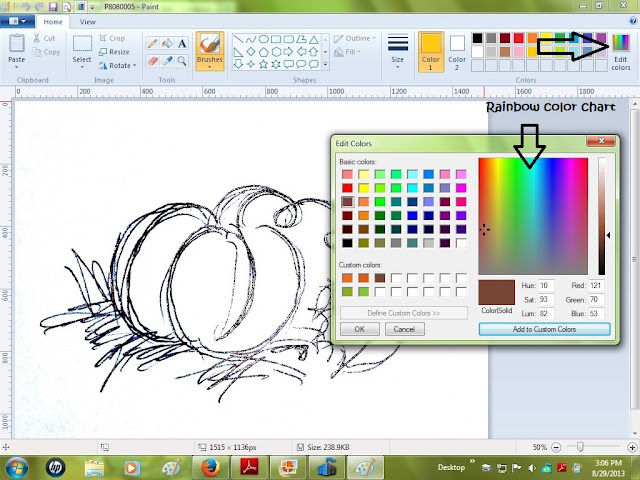 |
- Open your picture in the program "Paint" (How I did that: In
the previous photo, up on the right see the blue arrow, you can see where you can click on
a button that says "Extras" and it will say, "Open with Paint")
- Choose some custom colors to color your picture (or use the standard colors)
- Hit the Edit Colors button (See the black arrow where it
says "Edit Colors")
- On the pop up color screen that pops up click on different areas of that rainbow area and get the colors
you want by then clicking "Add to Custom Colors" You can see I've
chosen a couple oranges, greens, and a brown.
|
|
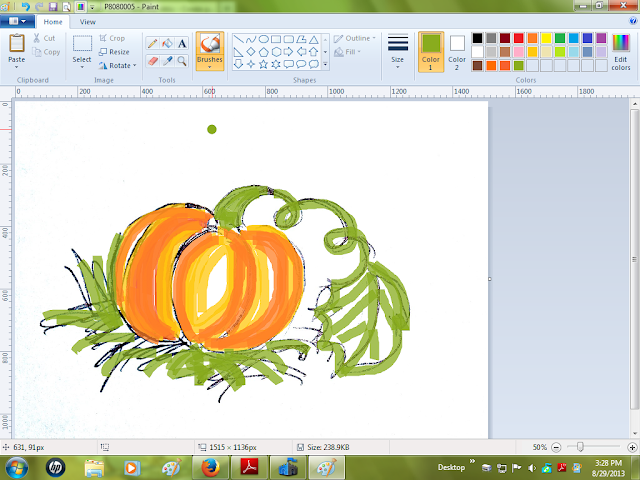 |
- Choose a "brush" (there are all sorts of coloring implements- brush, marker, color crayon, etc.) I used the "marker" here and I love it because I like the way the colors over lap each other and show through a little. (on my final "button" artwork, you'll see that I overworked it a little because I couldn't get it just right, so kept applying other colors and redoing it with all the different "brushes"including the "air brush" feature.
- You can also adjust the size by clicking the box next to the colors, that says "size" which allows you to cover a larger area or apply finer details.
- Color it anyway you want and have fun with it, like when we were kids! If you make a mistake, hit Ctrl Z to erase your last move.
|
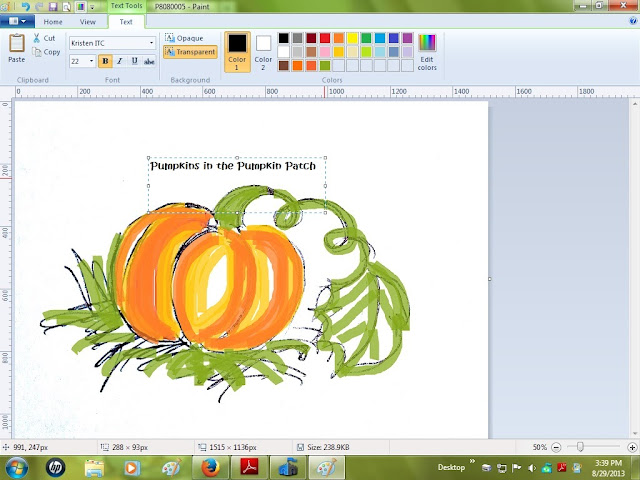 |
- Add text with the Text box tools. There are lots of fonts and you can adjust the size. Be careful NOT to click outside the text box until you're done because you can't go back to change size or color or font, once you do that.
|
Put a border around it using the "shapes" tool and you'll have a custom digital drawing to use for making your own "button" or clip art.


4 comments:
Wow, this is just what I needed to know! Thanks for showing us the steps! You are an artist, for sure! I love your raw sketch, even....
Susie
I'm so glad you shared this! I love your button and I wondered where you got it. Very clever! I'll have to play with that idea!
Thanks so much for sharing this! Excellent tutorial :)
So clever Sheri! I really like your pumpkin rendering, looks like chalk, I love using that medium!
Post a Comment