UPDATE: Here's a couple projects I made with the shamrock block tutorial.
Follow this Link if you want a little more information on these projects.
 |
| I wish each holiday could last at least a couple of months as I love to decorate in the holiday colors but it's a little annoying they change so quickly. Still, I love to get out the bin and start putting out the new decorations (and on the plus side, things get dusted, lol). |
 |
| I finished up the quilting and binding on these small quilts. The hand quilted one is best but of course a lot more time consuming so don't see a lot of hand quilting in my future. |
 |
| Purples always pretty with greens |
 |
| Glad I got the shamrock wreath completed from last year. |
 |
Old Pillows. I don't like the dullish greens on that one on the left. Definitely need some brights and darks for proper St. Patrick's day colors!
|
 |
| My friend Faith asked me to make a tutorial for a shamrock block so am going to start a scrappy one |
 |
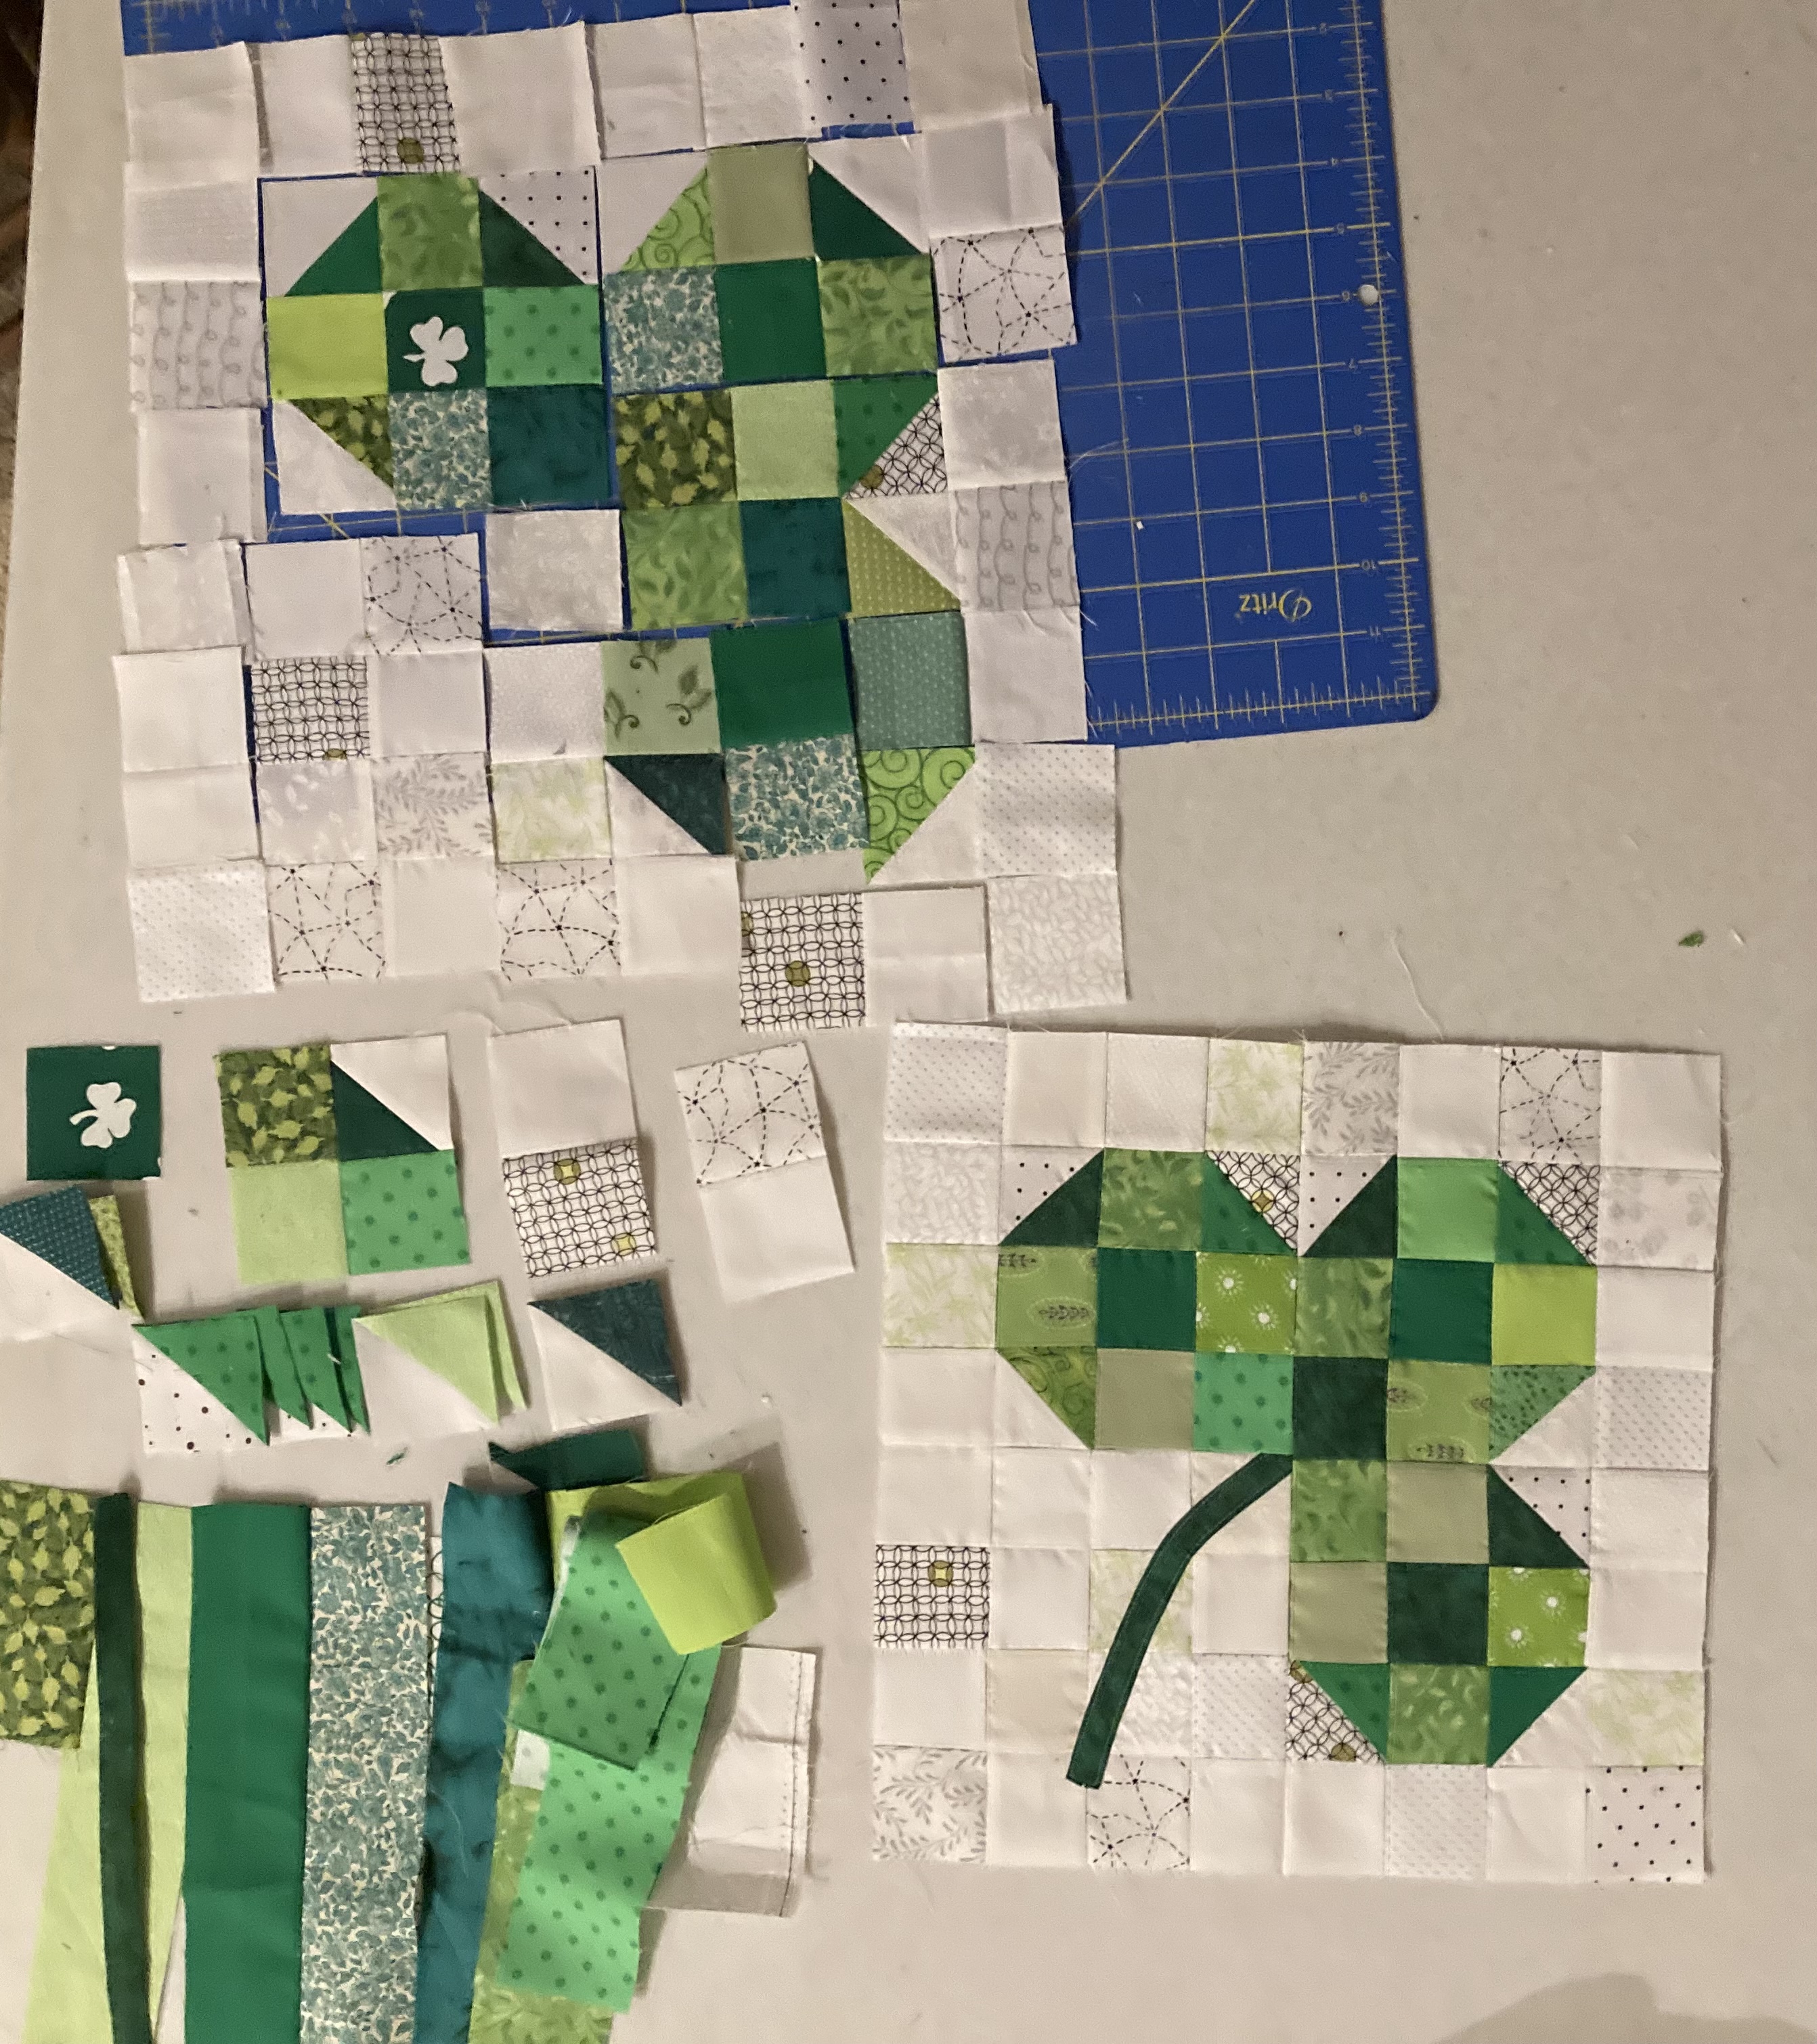
| So, gather some scrappy whites and greens. You can cut 2-inch strips of white and green fabrics or with small scraps can cut two-inch squares. If you have strips, you can sew them together with a plan. In the picture below you will see I have laid out the pieces (some of which I had sewn in strips and then cut into 2 " sections) See below for making the half square triangles (HSTs) |
 |
| Made with two-inch squares and two-inch half square triangles (HSTs) Lay them all out and start sewing into 4 patches. Be sure to square up each 4 patches to be 3 1/2 inches. As you sew them together, always continue to square up. (A 9 patch will be 5" square; A 16 patch will be 6 1/2" square, etc.) |
 |
| Make 2" HSTs with your favorite method or here is my method below |
Cut 3 3/8' squares of background and green fabrics but if your scraps are smaller, you can also cut 2 3/8" squares
 |
| Place the background and green squares together. For the larger square, sew around the perimeter and then slice diagonally twice to make 4 HSTs. For the smaller square you can just slice diagonally once and then sew those edges together as shown, and you will get two HSTs. Press open and square up to 2 inches. |
 |
| To make the stem, you can use your favorite applique method or here's what I did. I used my bias tape maker. If you don't have one just cut a strip (on the bias preferably but doesn't have to be). I think mine is 7" long x 1". Fold in each long edge about 1/4" and also fold in the bottom and press. You can press a bit of a curve to it and then place it on your 16 patch of background and stitch down. I put the top edge so it will be within the seam line. |
 |
| This makes a 12" finished block. If you wanted to make it without the perimeter of white squares, it would be a 9 1/2" block (unfinished). If you made this block using 2 1/2" squares, it would be 12 1/2 unfinished without the extra white squares around the perimeter or 15 1/2 with the extra rows of white blocks. |
I'll update later with my completed runner that I'm hoping to get completed soon. Also planning to make a mini like the one my friend Trish made last year and I'll have some instructions to share also.
 |
| Here's a preview |