Hello! This little pumpkin is a pin cushion and here is a tutorial since, Astrid, the winner of the pumpkin pin cushion kit, will need it to complete her pin cushion. You may want to make one too since these can double as cute decorations!
- You need 8 leaf shapes. See the pic. for size which is 5 1/8" x 2 ". You can draw this "leaf" shape for your pattern. Use a variety of fabrics in coordinating colors.

3. Place right sides together and sew along one side
4. Here are the four pairs with the seam sewn along one side.
5. When you turn out the right sides, their form is a cup shape.
6. Now you're going to take two, and place right sides together (they will nest nicely into each other) and again sew down one side.
7. That will give you 2 half spheres
8. Nest the spheres one into the other with RIGHT sides together.
9. Now you will sew all the way around, but start about midway on one side and sew all the way around, but stop so you have an opening of about 2 1/2" for turning and to add the stuffing.
Second picture is a little larger
Now you have a deflated looking ball shape which is inside out.
10. Turn right side out.
11. Get a piece of brown scrap for the stem. Cut 2 1/2" by x 2 1/4" (or if you're doing multiple, you can do a longer piece and cut it off at the desired lengths.)
12. Sew RIGHT sides together and turn right side out. Leave the upper edge turned inside about 1/2 inch. If you've sewn a longer piece cut it off at the bottom. (In this picture, it's already sewed, turned right side out, with the top turned in and you can see the finished size is 1" x 1 3/4".
13. Stuff a bit of batting inside from the bottom.
14 Look in the seam at the top of the "pumpkin" for small opening and fold the bottom of the stem and stick it into the opening. (if you don't find an opening, pick out a couple of stitches)
This picture shows the stem from the inside after I poked it through from the right side.
15. Secure the stem by sewing it into the seam (by hand or machine-- I used machine).
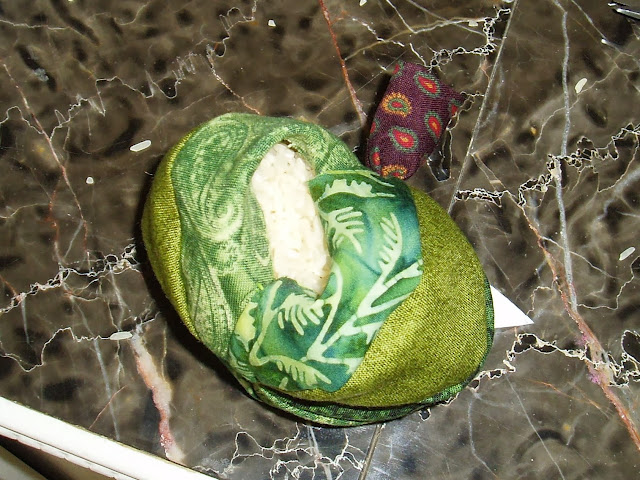
Ready for stuffing!
16. Put some batting scraps into the bottom of the pumpkin.
I used 1 cup of rice.
I put a little more batting scraps into the top part of the pin cushion to fill it out.
Stitch it closed.
After stitching it closed, you can push the needle down to the bottom and secure it there if the stitching is loose.
Now you can use it for a pin cushion or a little pumpkin decoration! (or you could even make an apple or some other spherical fruit!)


5 comments:
Sew cute! I used your Pin-It button and added it to my Fabulous Fall pin board. Thanks for the tutorial ... :) Pat
Thanks for the tutorial. I should have a pumpkin pin cushion in the next few days.
Great tutorial... I will make this for the season! Thanks!
Susie
Hi Sheri. You did a great job on the tutorial. I am planning on making one for me. I really like yours.
These are wonderful. Great tutorial and I love the idea of using an envelope as a funnel- genius!
Post a Comment