My friend Susie said that baskets, like bunnies, tend to multiply at her house and now it's happening here too!
 |
| Each basket takes two fat quarters, some batting, and buttons. That's it! |
These colorful Easter Baskets are simple and quick to make.
 |
| They are also Reversible |
I made my own tutorial for reference, because I altered the original pattern quite a bit. Click the READ MORE to see the tutorial.
Reversible Basket Tutorial
You will need:
1. 2 Pieces of fabric for the basket and lining 15" x 19"
2. 2 Pieces of fabric for the handle 17" x 2 1/2"
(Note: You could use 2 fat quarters)
3. A 1/2 yard or piece of batting 15 x 19" and (3) 1 3/8" x 16"
4. Buttons
 |
| Lay outside fabric on top of batting and quilt it (straight line or design of your choice). Note: I'm not including directions for using interfacing since I wasn't as pleased with that method. |
 |
The next instructions apply to both the quilted and lining pieces exactly (also make sure your lining piece is the same size as the quilted piece since quilting shrinks it)
1. On the folded edge, cut out 3 1/2" x 2 3/4" sections on both sides.
|
 |
Next you will taper the upper edge.
1. Position ruler so that the lower end of the ruler is at the edge and the upper part is 1/2 inch in and cut (see photo). Note: This isn't noticeable but is really helpful so the basket feels more sturdy (as fabric goes).
|
 |
| Repeat prior steps to the lining |
 |
| 1. Sew sides together (pic shows 2 separate pieces, one on top of the other) |
 |
| Now on each side, pull the opening together, centering the seam line, and sew it together. |
 |
| Picture shows how it looks when sewn. Repeat steps, both sides on both quilted part and lining. |
 |
| Now you have two sacks. |
 |
| Place right sides together and stitch along the top, leaving a 3 inch opening for turning. |
 |
1. Turn right side out
2. Press the edges
3. Press in the seam allowance on both the quilted and lining so that it will be easy and neat when stitching the opening closed and top stitching. |
HANDLE
 |
| Take handle strips and sew right sides together on one long side. |
 |
| Fold back both edges so that the finished size will be 1 1/2" and press. |
 |
1. Fold in the ends and press so they will be finished when you top stitch.
2. Lay 3 pieces of batting strips (a little less that 1 1/2" wide) inside and carefully fold closed, aligning to keep it straight (you may want to insert a few pins)
3. Top stitch 1/8" from the edge.
|
 |
| Finish the handle with top stitching several lines 1/4" apart and adding button holes if desired (otherwise you can sew the handle on and just add the buttons for decoration). |
 |
1. Top stitch around the basket edge with 3 or 4 rows of stitching, 1/4" apart (extra rows are optional).
2. Sew on the button, attach the handle, and your basket is complete! If you apply a button hole, the handle is removeable. It would also be cute to apply two handles with the buttons and button holes and the handles could fold down to each side like a picnic basket.
|
I'm linking up today with
Val's Quilting Studio Tuesday Archives. She's featuring Bunny's and Baskets so go by and see all the projects and add your project to the Link Party too!
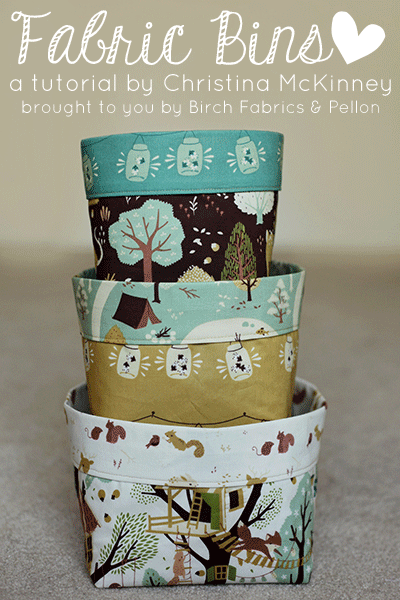
 Original pattern is from Christina at Birch Fabrics.
 http://birchfabrics.blogspot.com/2013/08/tutorial-fabric-bins-featuring-fort.html


 http://birchfabrics.blogspot.com/2013/08/tutorial-fabric-bins-featuring-fort.html


6 comments:
Great tutorial, Sheri! I love baskets of all kinds, especially ones made out of cute fabric. Thanks for sharing!
Thanks for the tutorial. Very cute!
I found you through Val's Quilting studio.
What adorable baskets! Your quilting on them makes them elegant, and gives them each different personalities! I really like the handle with the buttons.
Thank you for the excellent tutorial and pictures, step by step.
(I can see baskets, baskets, baskets popping up all over your house!)
Susie
Adorable!
Thank you so much for the great tutorial. I made a bunch of these baskets for our Easter celebration. Here is a link to my version, if you're interested: http://www.sunshinesews.com/2015/03/quilted-easter-baskets.html
HI Sheri, you have some really cute projects. Thanks for sharing your ideas. Baskets and bunnies just in time or Easter--and just adorable! Looking forward to see more of your creativity!! :) Thank you!!
Post a Comment