Easter Mini Wall Hanging with a little patchwork and a little applique.
 |
| All finished! |
 |
| Some of the fabrics even match this little table runner I made a few years ago. |
 |
| I embroidered on some eyes for the bunnies and chicks and some bows on the bunnys' necks and on the easter basket. I used all 6 threads. |

I added some machine free motion quilting on my domestic machine.
 |
| I'm going to add another line of embroidery between the bunny and basket and between the basket and chicks, like I did below the pink bunny. |

 |
| Finished size is 12 1/2 x 14 1/2" |
Supplies needed
Light weight heat and bond
embroidery floss
batting and backing 12 1/2 x 14 1/2"
(1) 8 1/2 x 10 1/2" background
(22) 2 1/2" squares for the border

 |
| Prepare background for applique by sewing (5) 2 1/2" squares together for each side of the 8 1/2 x 10 1/2" background piece. |
Then sew (6) squares in a row and sew all the strip sets to the sides and the top and bottom.

Prepare the pieces for appliqueing
| Print this out and trace onto adhesive iron on paper then cut out shapes and iron onto preferred fabric. (To print out, click on the picture, hit "print the screen" key, go to the Paint program and hit "Control V", then use the "select" function in Paint to "cut out" just the portion you want to print, and hit "control X". Now go to your word processor, to a blank document and hit "control V" and you'll now have a printable. You can adjust the size as needed. Contact me if you need further help.) |
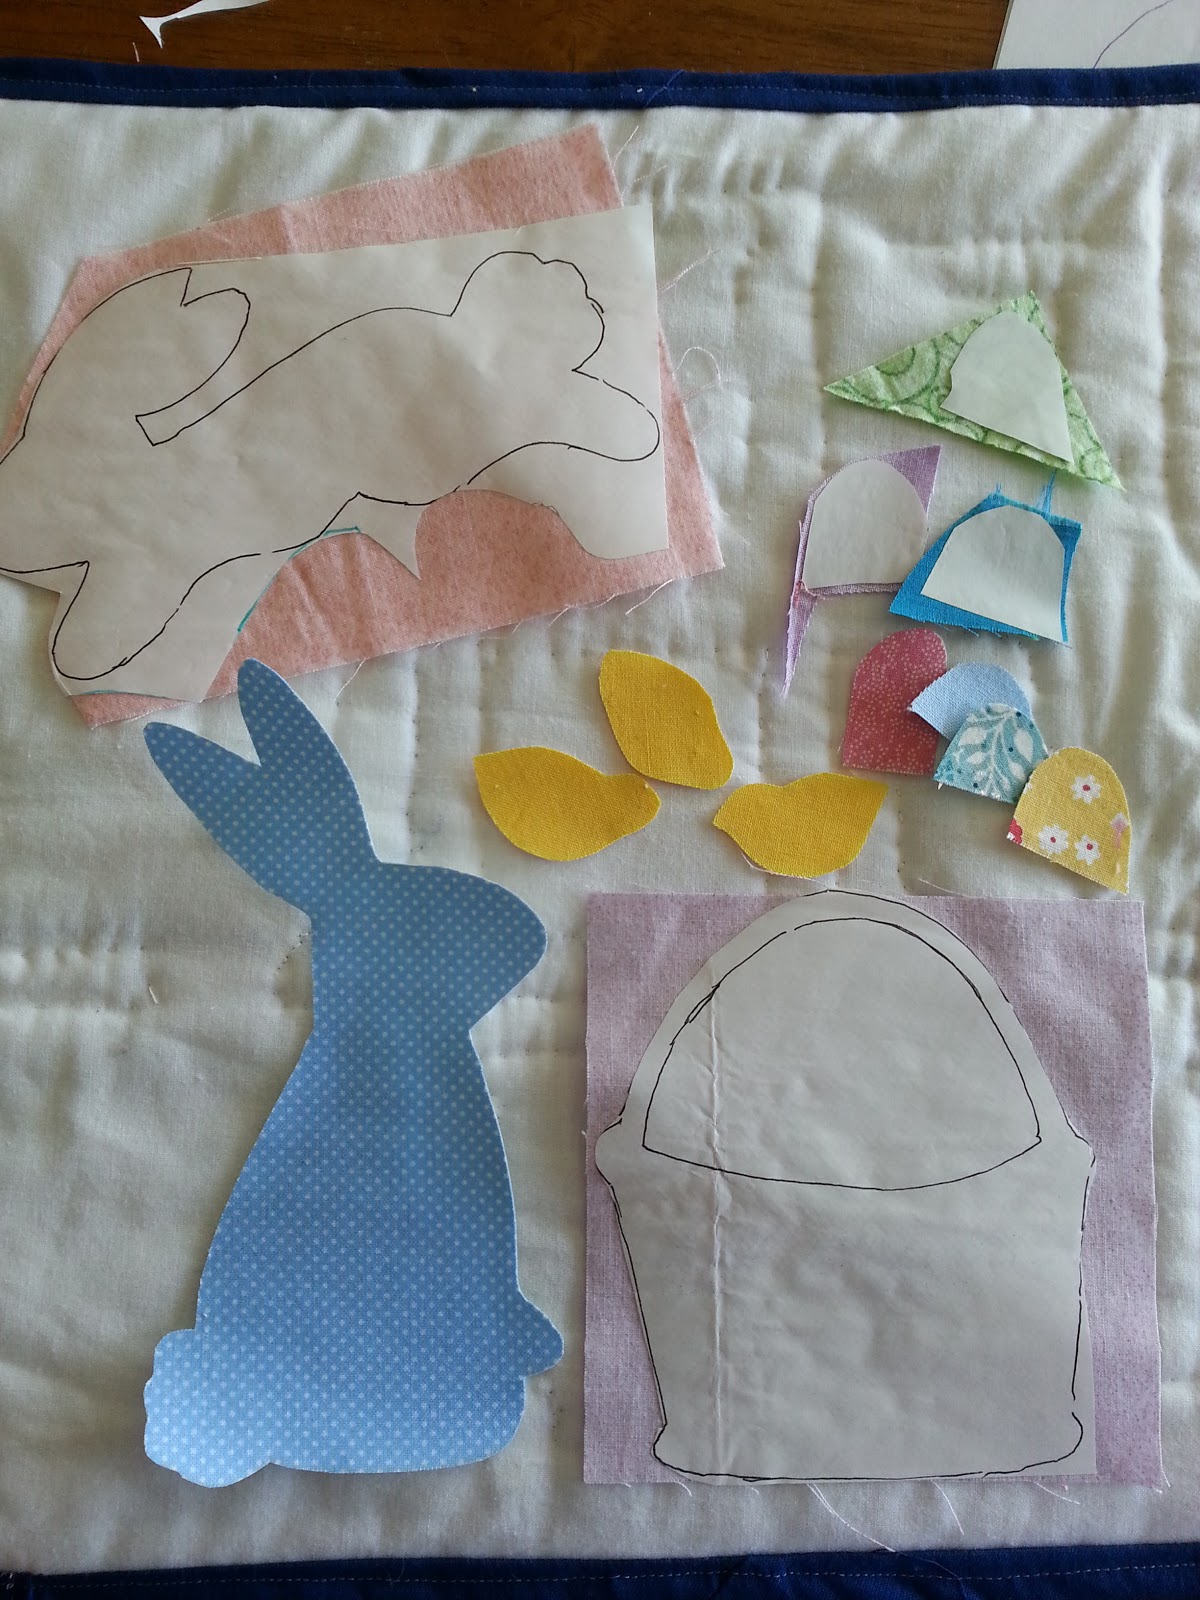 |
| Iron on to your chosen fabrics and then cut out. |
 |
| Arrange pieces onto the background piece (which you have already sewn the patchwork squares border, not shown). (Note, the eggs are a little long so you can over lap them and only applique the raw edges) |
 |
| Peel the backing off and iron on as desired. |
Add some embroidered details. Eyes, bows on bunny's necks, and basket handle. Eyes, beaks and feet on chicks and a bit of grass under the chicks (optional).
 |
| You could embellish with buttons and ribbon bows in lieu of embroidery. |
Layer top, batting, and backing together. Quilt and bind with preferred method. Add a hanging sleeve and display with your favorite Easter decorations.


3 comments:
Very sweet Easter hanging! Love the quilting you did, too!
Thank you for this adorable Easter wall hanging tutorial! So cute, and easy! Just in time for Easter! HUGS... and stitches
Sheri, this wallhanging is absolutely adorable! And your instructions are nice and clear. Well done! And thank you!
Post a Comment