I pieced together this quilt top in purples and lavenders a couple months ago and added some borders today. I'm trying out my new GoPro camera which attaches to a head band allowing a person to take videos while engaged in activities. Here we go:
It's short because it takes a little while to load up even this short video. Hopefully I'll learn and be able to give some good presentations if needed in some tutorials in the future! This is fun!
Saturday, December 28, 2013
Trying Out A New Toy!
I was talking about my blog one day when I was asked if I had videos on my blog. I said, no because I couldn't hold the camera and sew at the same time.
Here's my first attempt: Waving into the window (since it's dark-- it's sort of like a mirror).
A picture is worth a thousand words, but sometimes a video may come in handy!
 |
| It was suggested that I get a GoPro. |
 |
| I mentioned it to my husband and got it as a Christmas gift! |
Here's my first attempt: Waving into the window (since it's dark-- it's sort of like a mirror).
A picture is worth a thousand words, but sometimes a video may come in handy!
Tuesday, December 24, 2013
Merry Christmas Eve!
I'm still managing to squeeze in some last minute crafty/sewing things. It's been especially fun to go drop little gift bags off (must be how Santa feels!)
 |
| Quick and simple gift tags. The pearl cotton thread makes a perfect lovely string for tying on the gift tag. |
 |
| A little sewn gift bag (on the left) holds the crystal angel book mark you'll see in a minute. |
 |
| Finished Potholder (put it in gift bag with a jar of Chocolate Chip cookie mix for a friend) |
 |
| Another potholder. |
 |
| Another favorite prequilting hobbie (jewelry making). This is a book mark made for a friend. |
 |
| Don't you just love Swarovski crystals! I linked up with Inspiration Monday Party at http://www.ishouldbemoppingthefloor.com/ |
Friday, December 20, 2013
Last Minute Christmas Sewing and some mitered corners tricks!
I'm still working on a few Christmas Projects.
This just needs some binding and it'll be a cute potholder.
And it even has a recipe!
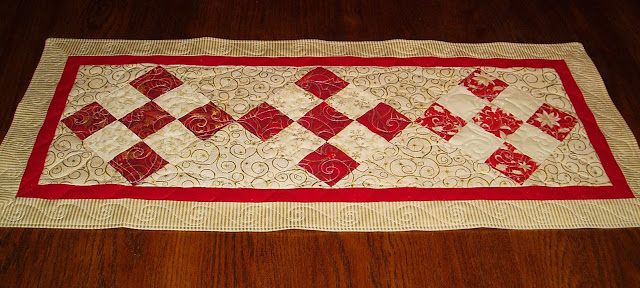
Did you see this table runner?
Here are my versions in more traditional colors, in process:
I was so excited today. I have long been admiring mitered corners especially with striped borders! I've read numerous tutorials on the subject but have been too imtimidated to try it. I don't know why I got brave today! I just got this striped gold metalic fabric from Connecting Threads (on sale) and it's perfect for the border (and thank goodness because everything else I tried looked terrible!)
Finishing up the Row Houses Christmas Quilt.
And it even has a recipe!
 |
| I love this 9 patch Table Runner made by Sherri McConnell of a Quilting Life. She has a great free tutorial that is easy to follow. Click anywhere here to go to her tutorial if you want to make one. |
 |
| 9 Patch Table Runners |
 |
| I was pretty surprised to see that this corner turned out well! |
 |
| Here I'm pulling the corner down because I'm going to line up the upper border with right sides together as you'll see in the next photo. (The diagonal was already cut from one of the other edges.) |
 |
| Each corner turned out pretty good! |
 |
| Ready for Quilting. I placed the backing and top right sides together and with the batting on the bottom, sewed all together around the edges, leaving 4 inches open for turning. |
 |
| I guess I should call it, "Glitter Red and Gold Table Runner". I wonder if I made the backing very slightly smaller than the front if it would lay more smoothly? |
Finishing up the Row Houses Christmas Quilt.
 |
| Finishing up the Machine Quilting |
 |
| This was the first time I was able to go from edge to edge and not have to finish up on the small machine. The tension was good but I did have quite a bit of trouble with the thread breaking. |
 |
| Quilting all complete and ready for binding. |
 |
| Quilted with red thread. |
 |
| Red, green, and cream colors. |
 |
| Binding complete. |
 |
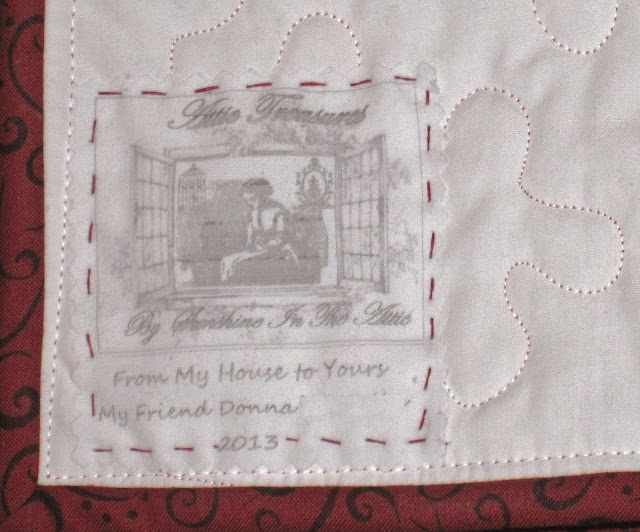
| Still toying with label making. Maybe if I had a different printer it would turn out better. |
Sunday, December 8, 2013
Sewing in a Winter Wonderland!
Earlier this week, RBD said, "There's a 100% chance of snow on Friday night, let's go!" So I packed up my quilting stuff and we took off on Friday morning.
 |
| When we arrived, it was 34 degrees inside, so RBD got a good fire going in the wood stove! After a couple hours, we could take off our coats. |
 | |
| I had completed the houses borders earlier in the week, but added the red sashing yesterday. It's now ready to quilt! |
 |
| The snow began to fall at about 6:30 p.m on Friday night. When we woke up this was the view from the dining room window where I was sewing! |
Subscribe to:
Comments (Atom)
Winter Stars
I used winter-y fabrics to make this pattern from She Can Sew. It's called Super Star and this is the link Quilted with snowflakes ...

-
Note: See the section with cutting instructions for yardage requirement update but beware as amounts haven't been tested. Popular Log C...
-
<a href="http://www.bloglovin.com/blog/5884165/?claim=t88azavjavu">Follow my blog with Bloglovin</a> Welcome ...
-
I have really enjoyed seeing all the projects from the Christmas in July blog hop and am in the mood to sew some more! I hope you lik...


