Welcome to Christmas Corner, a place to share Christmas projects throughout the year.
 |
| Have you begun or continued any Christmas sewing? Or is it much too early to be in the mood? |
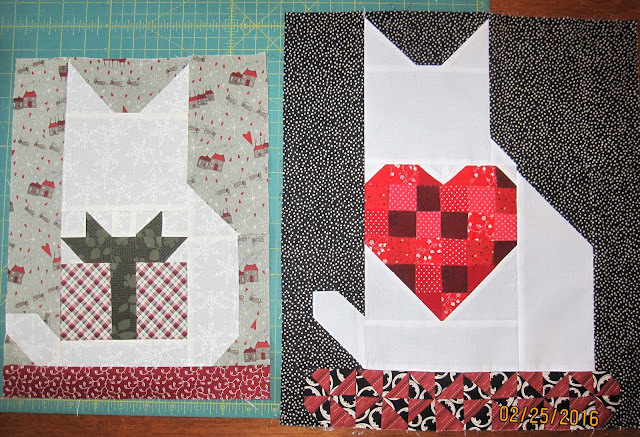
I'm so excited to tell you of progress on some Christmas UFO's and even a new Cozy Kitten to go with the
Cozy Catz quilt along!
 |
| This mini quilt stand from Connecting Threads is just right for displaying the 10 1/2 x 13 1/2"Cozy Kitten wall hanging. The stand is 20% off so I bought one. I didn't buy the decorative header, but the Christmas tree or holly one would both look nice so I may spring for it. |
Here's a little progress on:
 |
| Big Scrappy Christmas Stars Quilt |
From 14 to 22 stars is pretty good progress. Still need about 3 or 4 more rows.
Quilt Doodle quilt I made back in 2014
 |
| Quilting completed, red batik binding made since this quilt is mostly batiks |
AND TA DA!
 |
| It's all done! |
 |
| The back is a flannel deer print for extra warmth and cuteness on a chilly night! |
Read on for the Cozy Kitten Tutorial
Cozy Christmas Kitten Tutorial
Choose some coordinating fabrics: One for the cat, the background, the gift, the bow, and the the cushion. (Other than the background, I used one 10" square from a layer cake for each, so you really don't need much fabric.)
Cut the following pieces as shown. Also cut (3) 1 1/2" cat fabric squares which will be the background of the bow (not shown)

Sew together using the following diagrams.
 |
| Here you can see where the smaller pieces are lain onto the larger strips and sewn in order to round the corners. Also sew around the perimeter of the 2 3/4" squares. Always right sides together and 1/4" seams. Below are bigger individual pictures of the above. |
 |
| For all diagonally sewn seams, press out, trimming away excess, leaving 1/4" seams. Square up as needed to maintain the original dimensions. Cut the 2 3/4" square which was sewn around the perimeter, diagonally twice, as shown (left). |
 |
| Press open the pieces from the 2 3/4" square that you cut diagonally. Square up to be 1 1/2" half square triangles HSTs. Sew the other gift piece onto the other side of the ribbon and press open. |
 |
| Lay pieces out as shown. You're now ready to start assembling. |
 |
Sew ear section to head as shown.
Sew tail piece to bottom of gift as shown.
Sew lower right background to lower haunch section.
Sew bow pieces as shown. The two outer bow sections should be squared up to be 2 1/2" before sewing it all together. |
 |
Complete sewing the bow section together.
Sew the end of the tail to the bottom of the left hand border as shown. |
 |
Now sew the head and gift sections together.
Then sew the side pieces on.
Last sew the cushion on. (Note: since my cushion piece needs to be 10 1/2" long, but I used a 10" layer cake square, I cut an extra 1 1/2" square and sewed it together.) |
 |
| Here is your finished block. You can save it to be part of a Cozy Catz Quilt or larger wall hanging with some other Cozy Catz or finish it up for a smaller wall hanging or other project like a pillow! |
 |
| Because I wanted to hang mine up on my new little metal quilt hanger, I cut a backing the same dimensions as the block 10 1/2 x 13 1/2" approximately. |
 |
| I made a little label and zig zagged it onto the back. |
 |
| Being frugal as I am, I pieced some scraps of batting together. |
 |
| I embroidered on a face and then quilted with free motion quilting. I wish I'd done some stippling instead of the big loops. Oh well. |
 |
| It needed a hanger so I cut two pieces 5 1/2 x 2 1/4". I hemmed the short ends by pressing under the ends 1/4" twice and stitched down. I pinned them to the top back edge and they were sewn on as I applied the binding. |
 |
| I stitched down the hangers by hand to prevent them from lifting up when I put it on the metal stand. |
 |
| And that is the end of the Cozy Christmas Kitten tutorial. As always, let me know if you have questions or find mistakes. Thanks! |


6 comments:
That kitty is so cute. Thanks for the tutorial. I would love to make one for myself.
Hi Sheri,
Great progress on Christmas Scrappy Stars, and well done finishing Quilt Doodle.
Love your Cozy Christmas Kitten mini quilt! Thank you for the tutorial.
Barbara xx
What a cute little kitten. Two of my daughters are cat lovers and I know they would love this for Christmas. Thanks for sharing the pattern.
It is a little to early for Christmas so I wont be sewing Christmas until July. I am working on Easter and summer right now.
What a great mini Sheri!
Thanks for linking up to Ho, Ho, Ho and on We Sew too
Awwwwwwwwwwww your Christmas kitty is adorable - and no, it's not too early to be in the mood for Christmas sewing - there's a blizzard going on outside right now so this is perfect Christmas sewing weather, lol!
Such a cute mini quilt! I love kittens! And I wish I could quilt, but I'm kind of intimidated by quilting. Anyhoo, thanks for sharing this lovely tutorial at the Christmas In July Link Party. I have selected it as one of my features at SewCraftyCrochet.com. Have a great rest of the week!
Post a Comment