Thursday, April 28, 2016

Retirement Quilts

Update:  It's been over two years since this post and now my manager, Maggie is retiring, so I thought I'd put a link to her retirement quilt here.


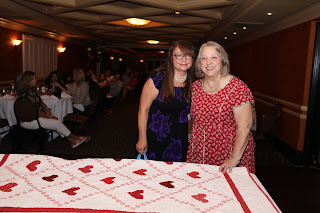
My manager, Maggie, began a tradition to give a quilt to everyone who retires and when I learned to quilt I volunteered to be her helper.
Maggie (and her daughter) pieced together this beautiful log cabin quilt.  It took my breath away as I did the machine quilting.  It is so pretty that I took out pinks on hand and will probably not be able to resist beginning yet another project and I'm okay with that!
HERE IS A LINK TO A TUTORIAL FOR THIS QUILT BLOCK, SOME OF YOU REQUESTED


Since we have three coworkers retiring this year, I took on a whole quilt by myself.  I began this Scrappy Cats Quilt (for a cat lover of course) back in January and hope to complete it soon as the retirement party is coming up.
Got all 12 noses ironed on (still need to machine applique), some eyes sewn on, and one cat with whiskers embroidered on so far. 
     

Thursday, April 21, 2016

Crossroads Quilt Along

Hello again!  Find out about the Crossroads Quilt Along and download the blocks here.  $5 donation is recommended to support the March of Dimes.  There are only 10 blocks so far but I made two extra house blocks for the fun of it.
Just finished the Diamond and Friendship blocks to be all caught up!  

When I made the house blocks a couple months ago, my plan was to stay with those fabrics for the whole quilt, but then I forgot my plan and picked more new colors!
I chose an alternative pattern to construct the blocks quicker, using no waste methods and will share some cutting and brief sewing directions below.  Refer back to the Fat Quarter Shop for original directions and even some videos.
Cutting directions For the Friendship Block
Background Fabric:                                                             Color Fabric (for each block)
Cut (3) 3" squares for each block center                   (2) 3 7/8" squares (for flying geese)
Cut (3) 1 3/4 x 7" strips  (for corner squares)            (1)  1 3/4 x 7" strips (for corner squares)
Cut (12) 1 3/4 x 3" rectangles for corner squares
Cut (16) (3) 2 1/8 x 8 1/2" strips (subcut into (16)  2 1/8" squares for flying geese and draw diagonal line)     

Place the 1 3/4 x 7" strips (one background and one color together and press open)  Slice off 1 3/4 x 3" sections to sew together with 1 3/4 x 3" strips for corner squares.  

Make Flying Geese using no waste method with 3 7/8" square and 2 1/8" background squares.              
Cutting directions For the Diamond Block
HSTs:
Cut 5" square (3) background fabric and (1) each of color fabrics for each block (Place background and colored square together and sew around the perimeter and then slice diagonally twice to make HSTs for each corner.)

Diamond blocks:
(5) 2 1/4" squares (five each color for each block)
(15) Background fabric 3 1/4" squares, cut diagonally twice to make the triangles which will be sewn to each 2 1/4" square.  (Be sure to make sure the point is in the center before sewing on)

Press the triangles out and square up to 3" squares.
Make sure the 1 1/2" cross hair lines line up as shown in the photo above.

Thursday, April 14, 2016

Star blocks


Star blocks made with Salt Box Charms from Connecting Threads

I pulled out these three star blocks I made several years ago.  Luckily I had a little note and diagram in the bag showing how to construct the blocks.
 It took an evening to make each additional block
I started making the blue and cream blocks to maybe intersperse between the star blocks.

Thursday, April 7, 2016

Stars and Strips

Stars for the Scrappy Cats Quilt and Strips for more plus blocks!

Yay! ... some progress on the Scrappy Cats Quilt that I began in January and has since become a UFO.  Funny how quick a UFO happens!  I made the stars and ironed all 20 of them on.  Now for some machine applique (which isn't my favorite).
Here is the original post with pattern link.  This will be my challenge for The Crafty Quilter's Good bye UFO's, to complete for April.

  I've also made some progress on my little 5 inch plus blocks.
I've cut strips for at least 25 more blocks and I have 35 so far!  It'll take a couple hundred for a good sized quilt, so we'll see how far it goes.  Or it could be a baby quilt and be done much sooner!
Of course for photographing, a chubby calico has claimed the blocks for her own nap spot!

Friday, April 1, 2016

Plus Blocks

Happy Friday!  I am sewing plus blocks.  I have 20 completed so far.
The cutting dimensions are 5 x 2" and two 2" squares for the plus and four 2" squares for the background, which yields a 5" square.

This is a great block for scraps!

Thanks for stopping by!

Maple Leaf Block Instructions

To make the 9 1/2 inch maple leaf blocks:   Some basic instructions HSTs cut each, background and color 3 7/8” squares (cut diagonally once)...