I joined a small quilt club on Yahoo groups and Facebook hosted by Kathleen Tracy.
 |
| This small quilt is made with 4" unfinished blocks and finishes at 12 1/2" I did a bit of hand quilting. |
When I heard about the blue and Cream/White challenge...
 |
| ... it appealed to me because I haven't got to do much sewing this summer and this small project was so doable! |
 |
| I've been wanting to sew some log cabin blocks so pulled out some blues and creams and cut 1" strips and began to sew! |
 |
| I designed a little blue bird block to go along with the log cabins. |
4" Bird Block (3 1/2" finished)
 |
^
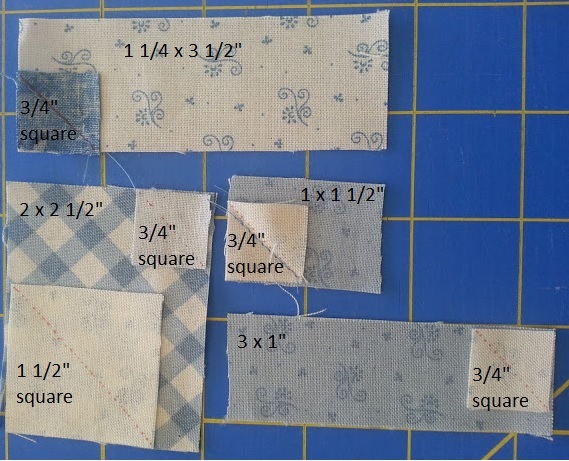
Cut these pieces: (Please note change of 1 1/2" background square to 2" square) |
Draw a diagonal line on these squares and sew the right sides together as shown on the diagonal line.
Again: Don't forget, this background square is 2" instead of 1 1/2".
Trim as shown leaving 1/4" seam
Press open and square up.
 |
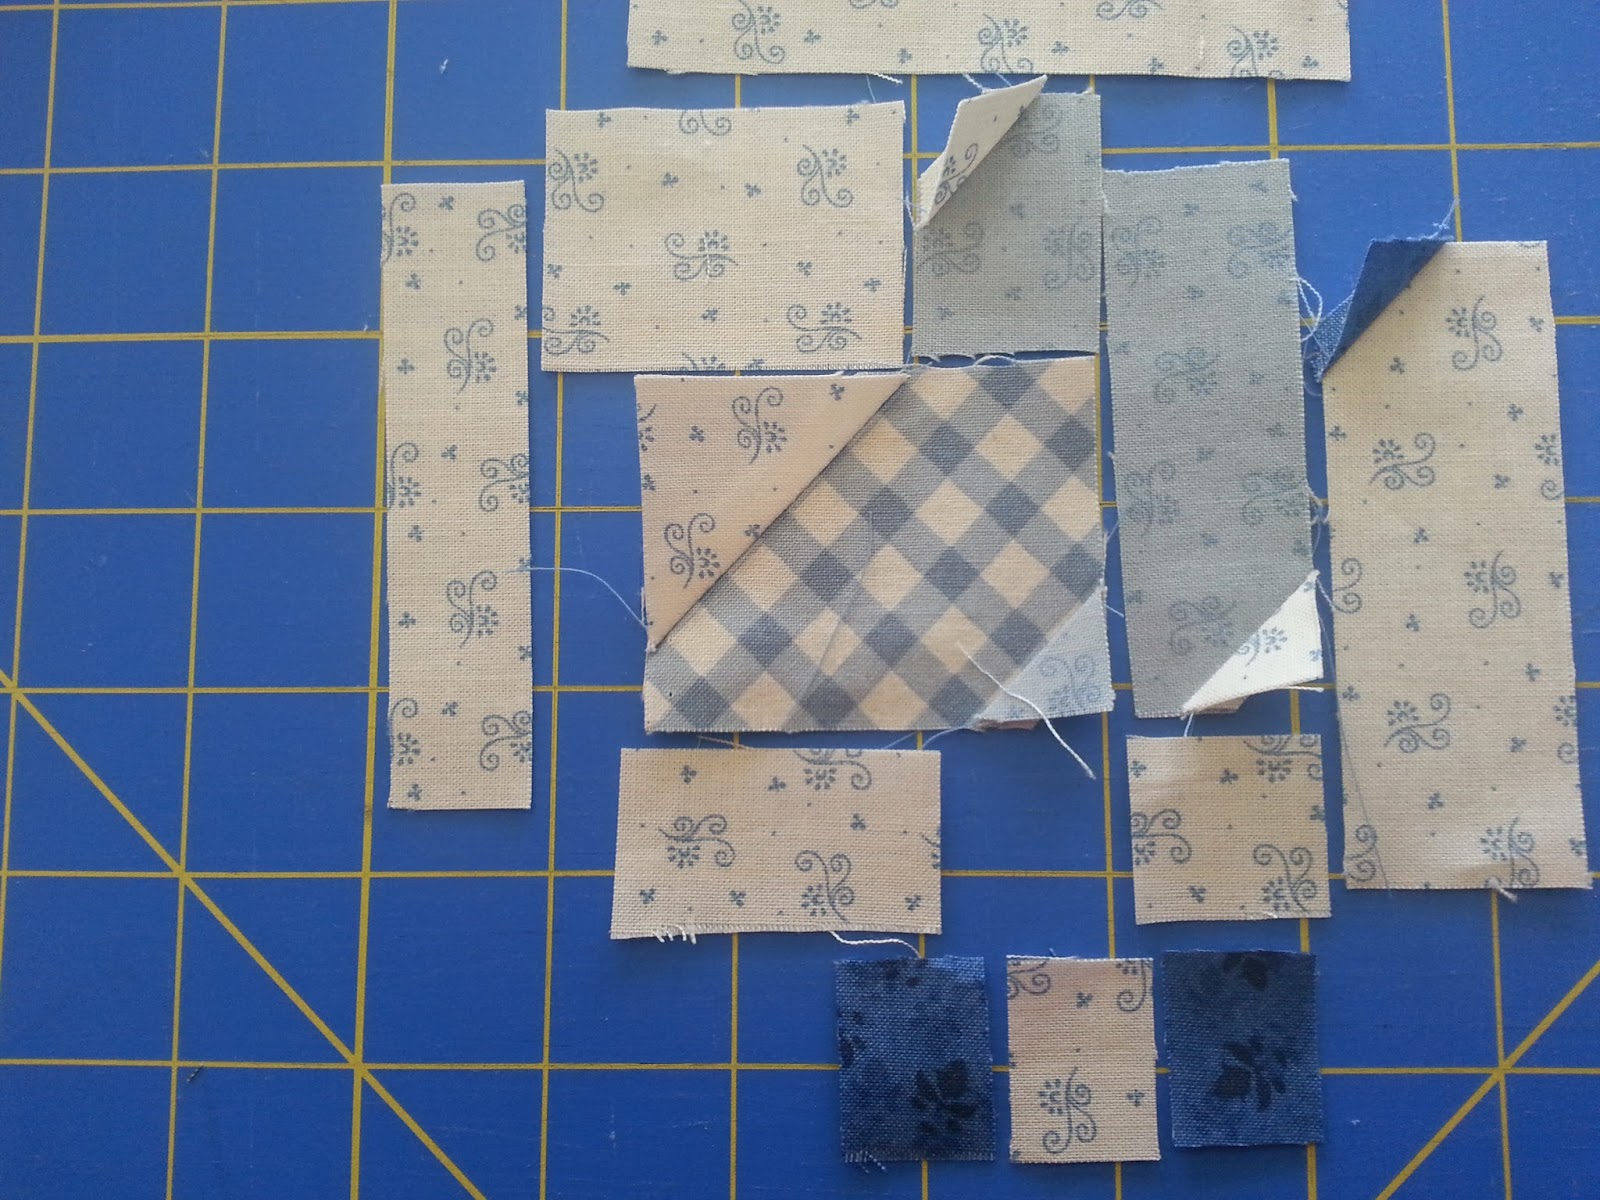
| You can see I've laid out the pieces, showing how they will go. |
Next
 |
| Sew the leg pieces and background together into a strip (I didn't sew the right background piece on here, but recommend to do it.) |
Bird Body
 |
| Sew together as directed above by the numbered steps (note: do sew the right hand background piece to the leg section which I didn't do in the picture) |
 |
Your bird section is now complete other than the background with the beak.
1. Sew the beak/background piece and the left hand border piece on
2. Sew the top background piece in place |
 |
| Your finished block! Note: this version has a bit of a hunch back. To correct that, I changed the square size used to angle the wing. |
 |
| Here is the sample block I just tested on the tutorial Note: I used a 1 3/4" background square to curve the wing, but I think if you use a 2" background square (as I directed in the above cutting diagram) it should take the hunchback away completely. |
I'm including these photos I took as I just tested the tutorial and they show how to make the bird face the opposite direction.
 |
| Cut out all the pieces as directed above |
 |
| Draw a diagonal line on squares as shown and then sew on that line to round the corners. |
 |
| Press all rounded corners open. |
 |
Sew the leg pieces together with the background pieces.
Sew the head to the background piece. |
 |
| Sew the head piece to the wing/body. |
 |
| Sew the front bird body to the main wing-body/head section |
 |
| Sew the leg section onto the wing/body |
 |
| Sew on side pieces as shown, then sew on the top border piece. Square up to 4" |


2 comments:
I love this. So cute!
Eeeek! You must be stalking me! This is just what I need to make, and it looks like something I should be capable of too! Tee hee!
I love it! Just too cute! I've had my blue scraps out this week too! Come and see!
Thank you for showing how to make it.
Barbara x
http://theflashingscissors.blogspot.co.uk/2017/05/finish-it-up-friday-post-full-of-minis.html
Post a Comment