Tuesday, July 1, 2025

Just in time for the 4th of July!!


Red, White and Blue Friendship Blocks

This is a clever pattern that is free from the Fat Quarter Shop but I tweaked it a bit!

The 42 friendship stars nest together.  I'll show you some pictures of how it is put together in the following images.

Here is a picture of the free pattern and you can click on this link to go to the Fat Quarter Shop and get your own.

I started with a dark and a light 15" square of fabric and sewed around the perimeter and then sliced diagonally twice which gave me four 13 3/4" half square triangles (HSTs).  According to the pattern you take your HST and cut it in half once so you will get 8 pieces which will now make two friendship stars, a darker one and a lighter one.
I started making more and more stars.  I wanted mine to be queen size so needed 42 stars. 


 I laid them in pleasing array alternating light and dark stars.  I put them on point to get them to look like friendship stars.

I started sewing them into blocks and laid them on point.

If you set them on point, you will need some setting triangles.  It went together fairly quickly.  I think I completed it in about a month.


Now I'm on to another patriotic quilt!  I found an old blog post at Confessions of a Fabric Addict in which she held a sew along.  She offered a coloring page so you can fill in your own colors and you can get it at the link for her blog.  I love Edyta Sitar's medallion quilts and decided to do this emulating Edyta's Liberty Star (the link goes to where you could see and buy her pattern or kit) which is similar but I find this kaleidoscope layout more pleasing and since it is a 9 patch, I think it'll go together quickly once I start cutting and sewing.


You need a kaleidoscope ruler and I have two but am using the Alaska ruler.  Edyta has a video showing how to use the ruler and there are also instructions that come with the ruler.

Hopefully I'll be back soon with another patriotic finished product!

Green and Black Hour Glass Quilt


This quilt is for a guy who loves green.
Started back in March so pretty good for me to complete in just a few months!

I'm not naming it but for some reason, I find it entertaining to think of names.  I thought maybe Emerald Isle, Emeralds and Granite, or Green Goblin.


I didn't forget to label it!

It was constructed with these hour glass blocks which I made by cutting out 14 1/2" squares of greens or blacks.  I cut them into four triangles by cutting diagonally twice, and then sewed into the hour glass block shape and trim to 13 1/4".  Later I saw a quicker way to do this, which would be to place right sides together and then sew along TWO sides across from each other and then slice diagonally once and then finish sewing those two into the hour glass block.

Sew blocks on point and use half an hour glass block for the setting triangles.  I added borders to make it a generous queen size.

Tuesday, March 25, 2025

Double Irish Chain Completed on March 17th

Where did the time go?  I thought I'd published this but must've forgotten.
Quilted and bound.

Before quilting and binding


Also completed this Clover topper.


Pretty quilting


Friday, February 28, 2025

Update: Sweet Valentine Quilt Complete

I finished this up last week and want to share it before February ends.


I'm so happy with how it turned out.

I added a red satin heart.  Quilted with Cora design by My Creative Stitches.

Scalloped border

With the striped biased binding


I used a pot lid to cut the corners and a scalloped ruler template.  


The straight border was so boring and seemed to want to be scalloped.


Change of plans.  I was originally going to apply a bow border, but decided it would be so busy looking, so I added red borders and then decided to scallop the sides and bottom 


Sunday, February 9, 2025

Valentines, Ribbons, and Bows

I wanted to publish before the holiday and may not get this complete so will go ahead and publish for now and update later.

I wanted to make a simple heart patchwork quilt but it seemed a little plain and so I sewed this log border in graduating lengths which I love!  The logs are 1 1/2" x 6 1/2, 5 1/2, 4 1/2, 3 1/2, 2 1/2 and 1 1/2 inches. 
 Then decided to add another bow border (what happened to simple?), which I'm working on now and I have made some instructions for, you can see below.
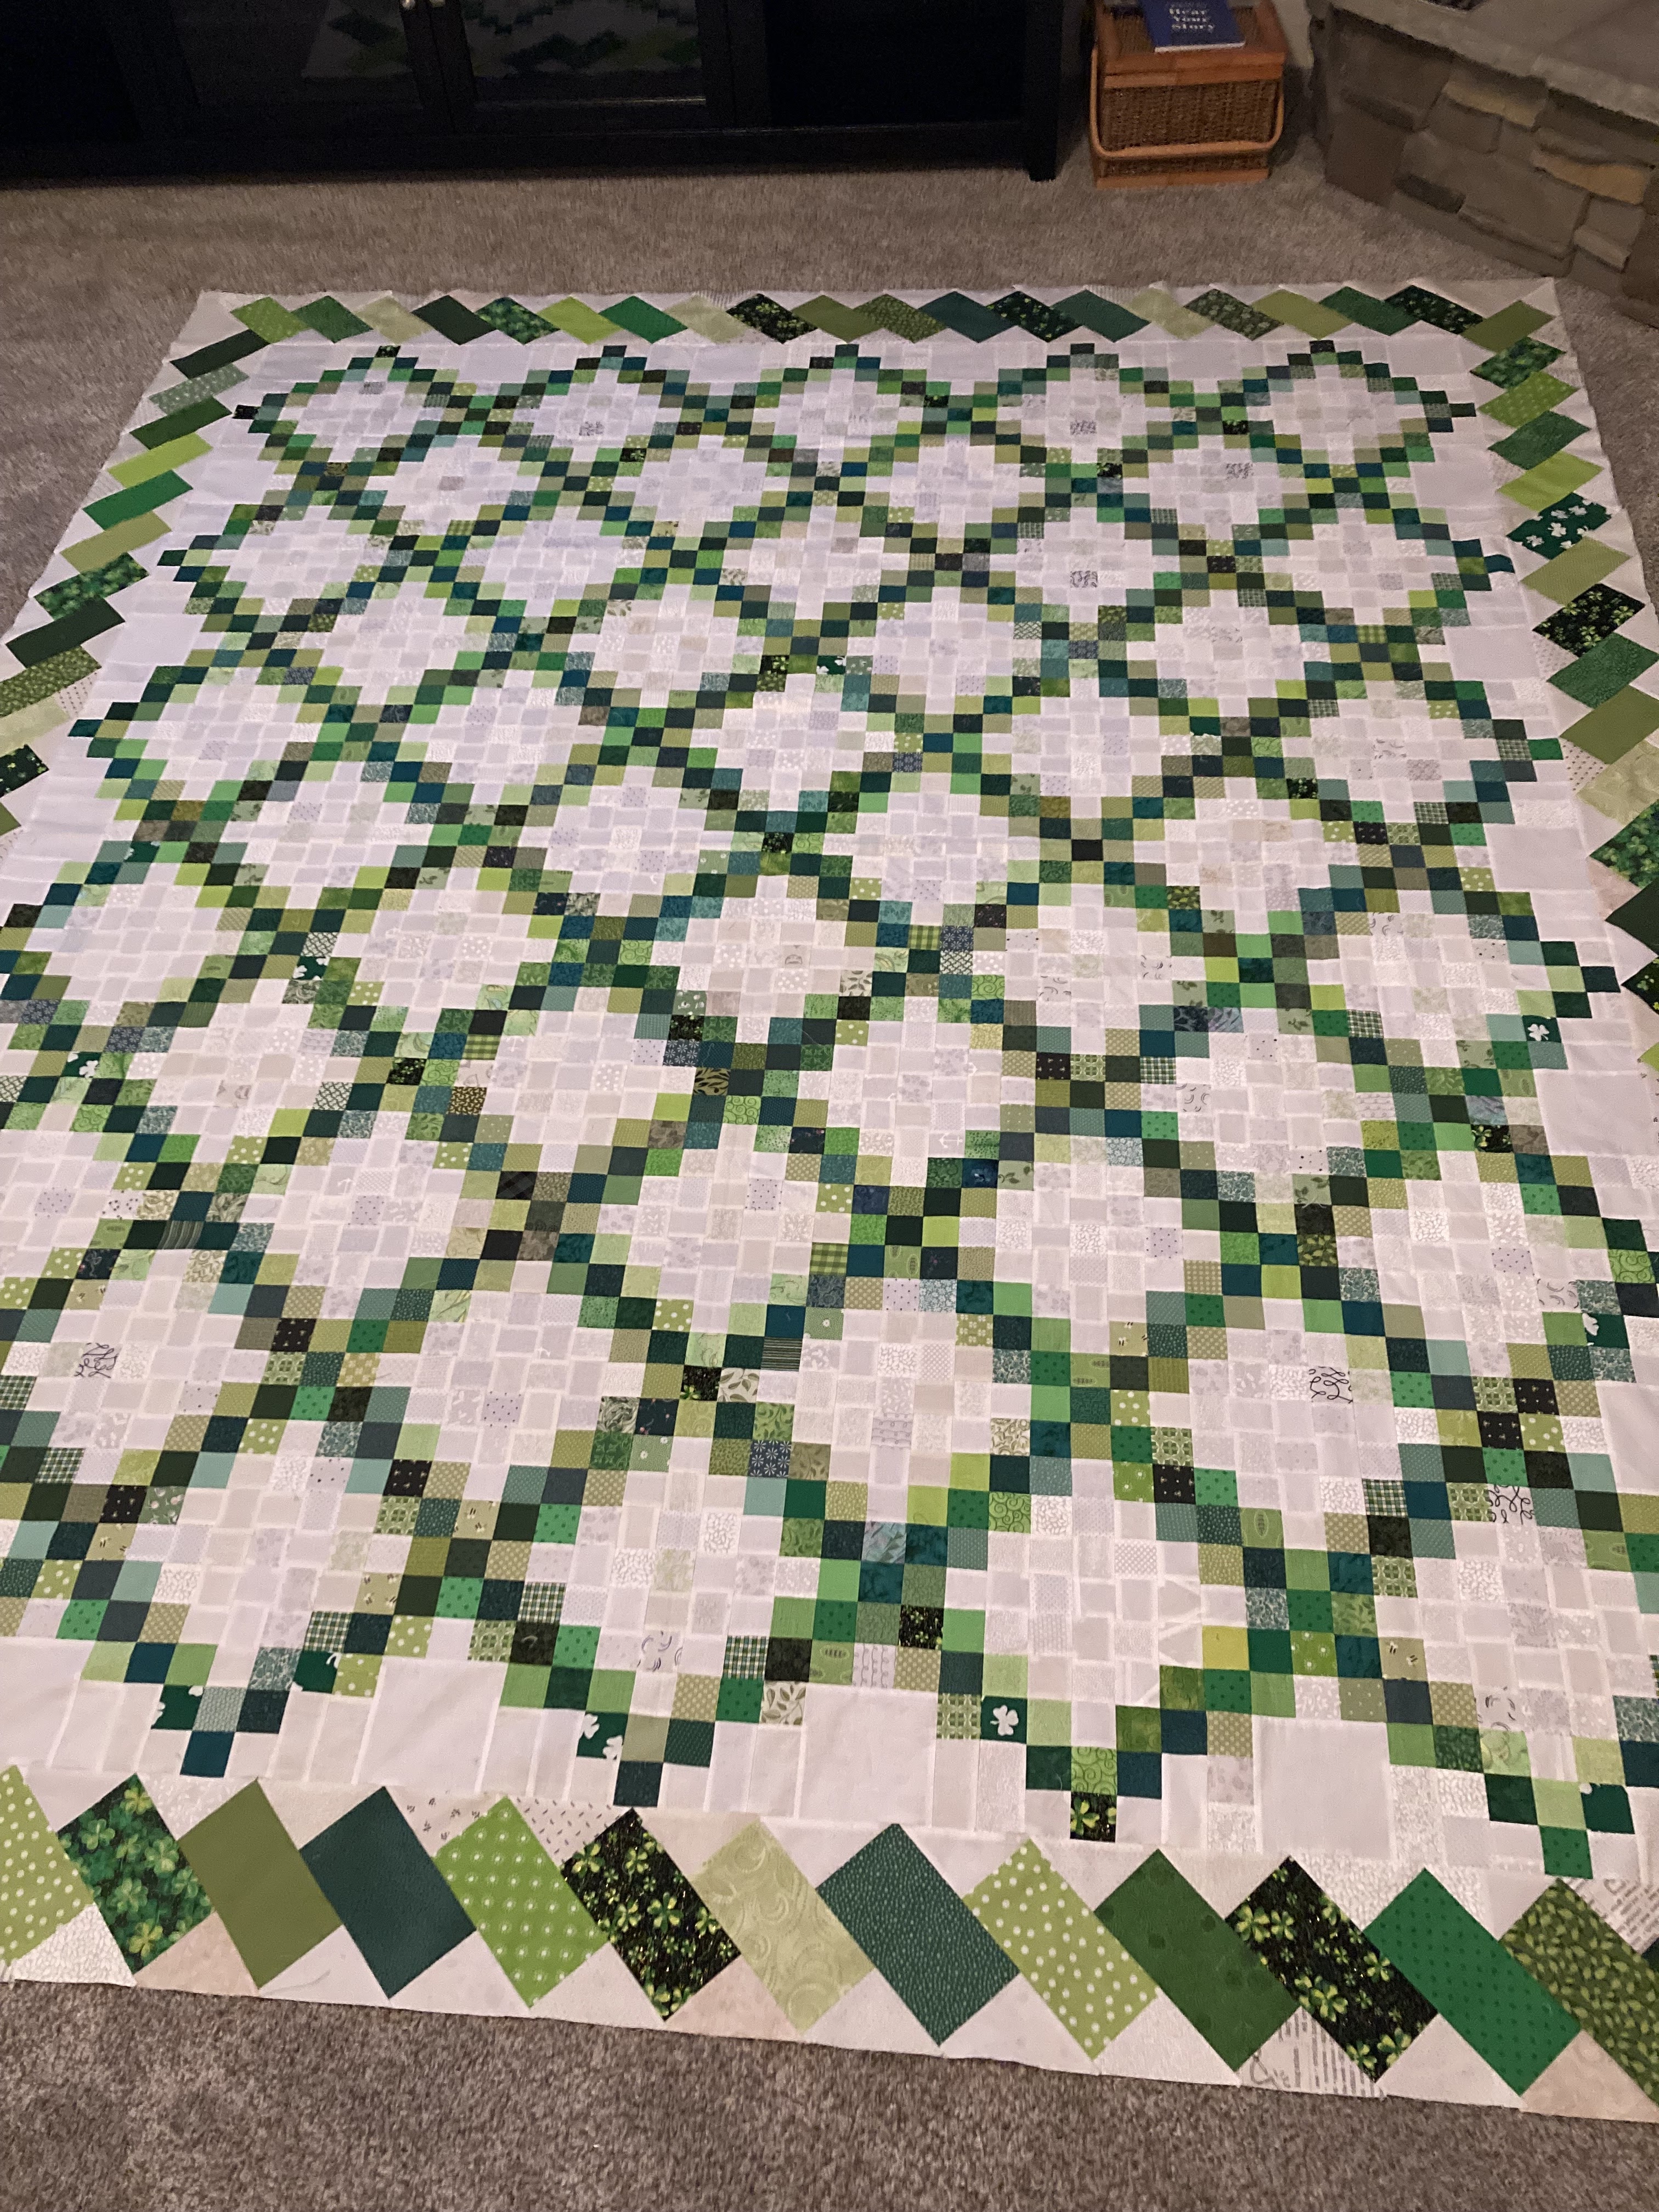

All scrappy

Actually, since I'm adding the other borders I took out a bunch of the hearts, so almost have enough to make a second quilt!  The 12 1/2" heart blocks are made using the tutorial, I share here.  Valentine block.  The only difference is those hearts nest, so here you have to add a triangle to each bottom side.  Cut a 6 7/8" square and cut in half diagonally, which will give you the two triangles that you need.


Here's a picture before removing quite a few of the blocks. Doesn't it just look a little too plain??

I made some diagrams with some cutting instructions below for the bows.  I'm going to make my streamer ribbons longer, so that is why the instructions say you can make extra ribbon parts.

I included three methods to construct the sections. I like to make templates which is less wasteful.  Be aware that some of the 2 1/2 x 4 1/2" blocks are mirror images which matters if your fabric has a wrong side and doesn't matter if it does not have a wrong side, because then you can just flip it over.
NOTE:  IF YOU USE THE STITCH AND FLIP METHOD OR THE HALF SQUARE TRIANGLE METHOD, THEN CUT THE WHITE RECTANGLES ON THE LAST DIAGRAM TO BE 2 1/2 X 4 1/4”!!

You do NOT need to stitch and flip the ribbon corners for the streamer parts, if you use the template method, but can just sew them together (saves lots of seams and sewing)


Monday, January 6, 2025

Happy New Year!

One New and Some Finishing up Projects.

First completed Project of the Year!  I started and completed this patchwork quilt in about a week, using a French General Layer Cake, called Joyous Noelle, I got years ago 

I made the little Reindeer Pillow in 2014.  I want to make a row quilt with a row of reindeer like this one along with some snow flakes and other sweater type Fair Isle motif rows.  Wow already setting goals.  Not really, seems to be those thoughts are going through my mind all the time.  This year to complete many from the past, plus some new ones!


Quilted with a holly and swirl design from My Creative Stitches.  There are quite a few squares that have charming holly in them, although there are also squares with snowflakes so I could've gone with a snowflake them panto also.

The layer cake only came with a few of these lovely squares depicting vintage motifs

I had to add some 10 inch squares from material I had on hand and this woodland one coordinated well and I love the whimsicalness of it!

This is made with 10 inch squares, 8 across and nine down, plus the borders.

This pub topper was a quilt along with The Fat Quarter Shop quite a few years ago.  I added the sashing with the star cornerstones and added the borders and quilting a year or two ago.
I started packing up my Christmas stuff and had this on the pub table with no binding.  I saw it needed a quick wash so completed it with green binding before washing..

Here ar a few up close photos


I snapped a few more pictures I did of this Christmas/wintery quilt I made in a couple of weeks just before Christmas.  Another using layer cake squares and yardage.


I already blogged about it but the pictures don't look very pretty so I cleaned the camera lens on my phone and snapped a few more.  Isn't this up close scene pretty?

This block is whimsical with woodland creatures and foliage

Some more woodland creatures from my stash and you can see the Christmas trees panto


Just in time for the 4th of July!!

Red, White and Blue Friendship Blocks This is a clever pattern that is free from the Fat Quarter Shop but I tweaked it a bit! The 42 friends...