Tuesday, July 4, 2023

Happy Independence Day!!


I soooo love Red, White, and Blue!
Here's a couple of old projects and a new one. I completed the pillow and sent to my friend, Donna, for her birthday.


Isn't this a Sparkley Sparkler!  I'm going to put it on my pub table for a topper.
It’s a medallion quilt style of my own design using 3 1/2 inch squares all around the center block with some 6 1/2 inch star blocks to give it a little patriotic pizzazz. I’m going to present a tutorial for the blocks in a few days.  It's a great pattern to use up scraps.


My little Collection of Red, White, and Blue Minis is slowly growing!  I see these when I walk up my stairs to my sewing room, and they make me happy!

I hope you all have a wonderful 4th of July!

Saturday, April 8, 2023

Hoppy Easter

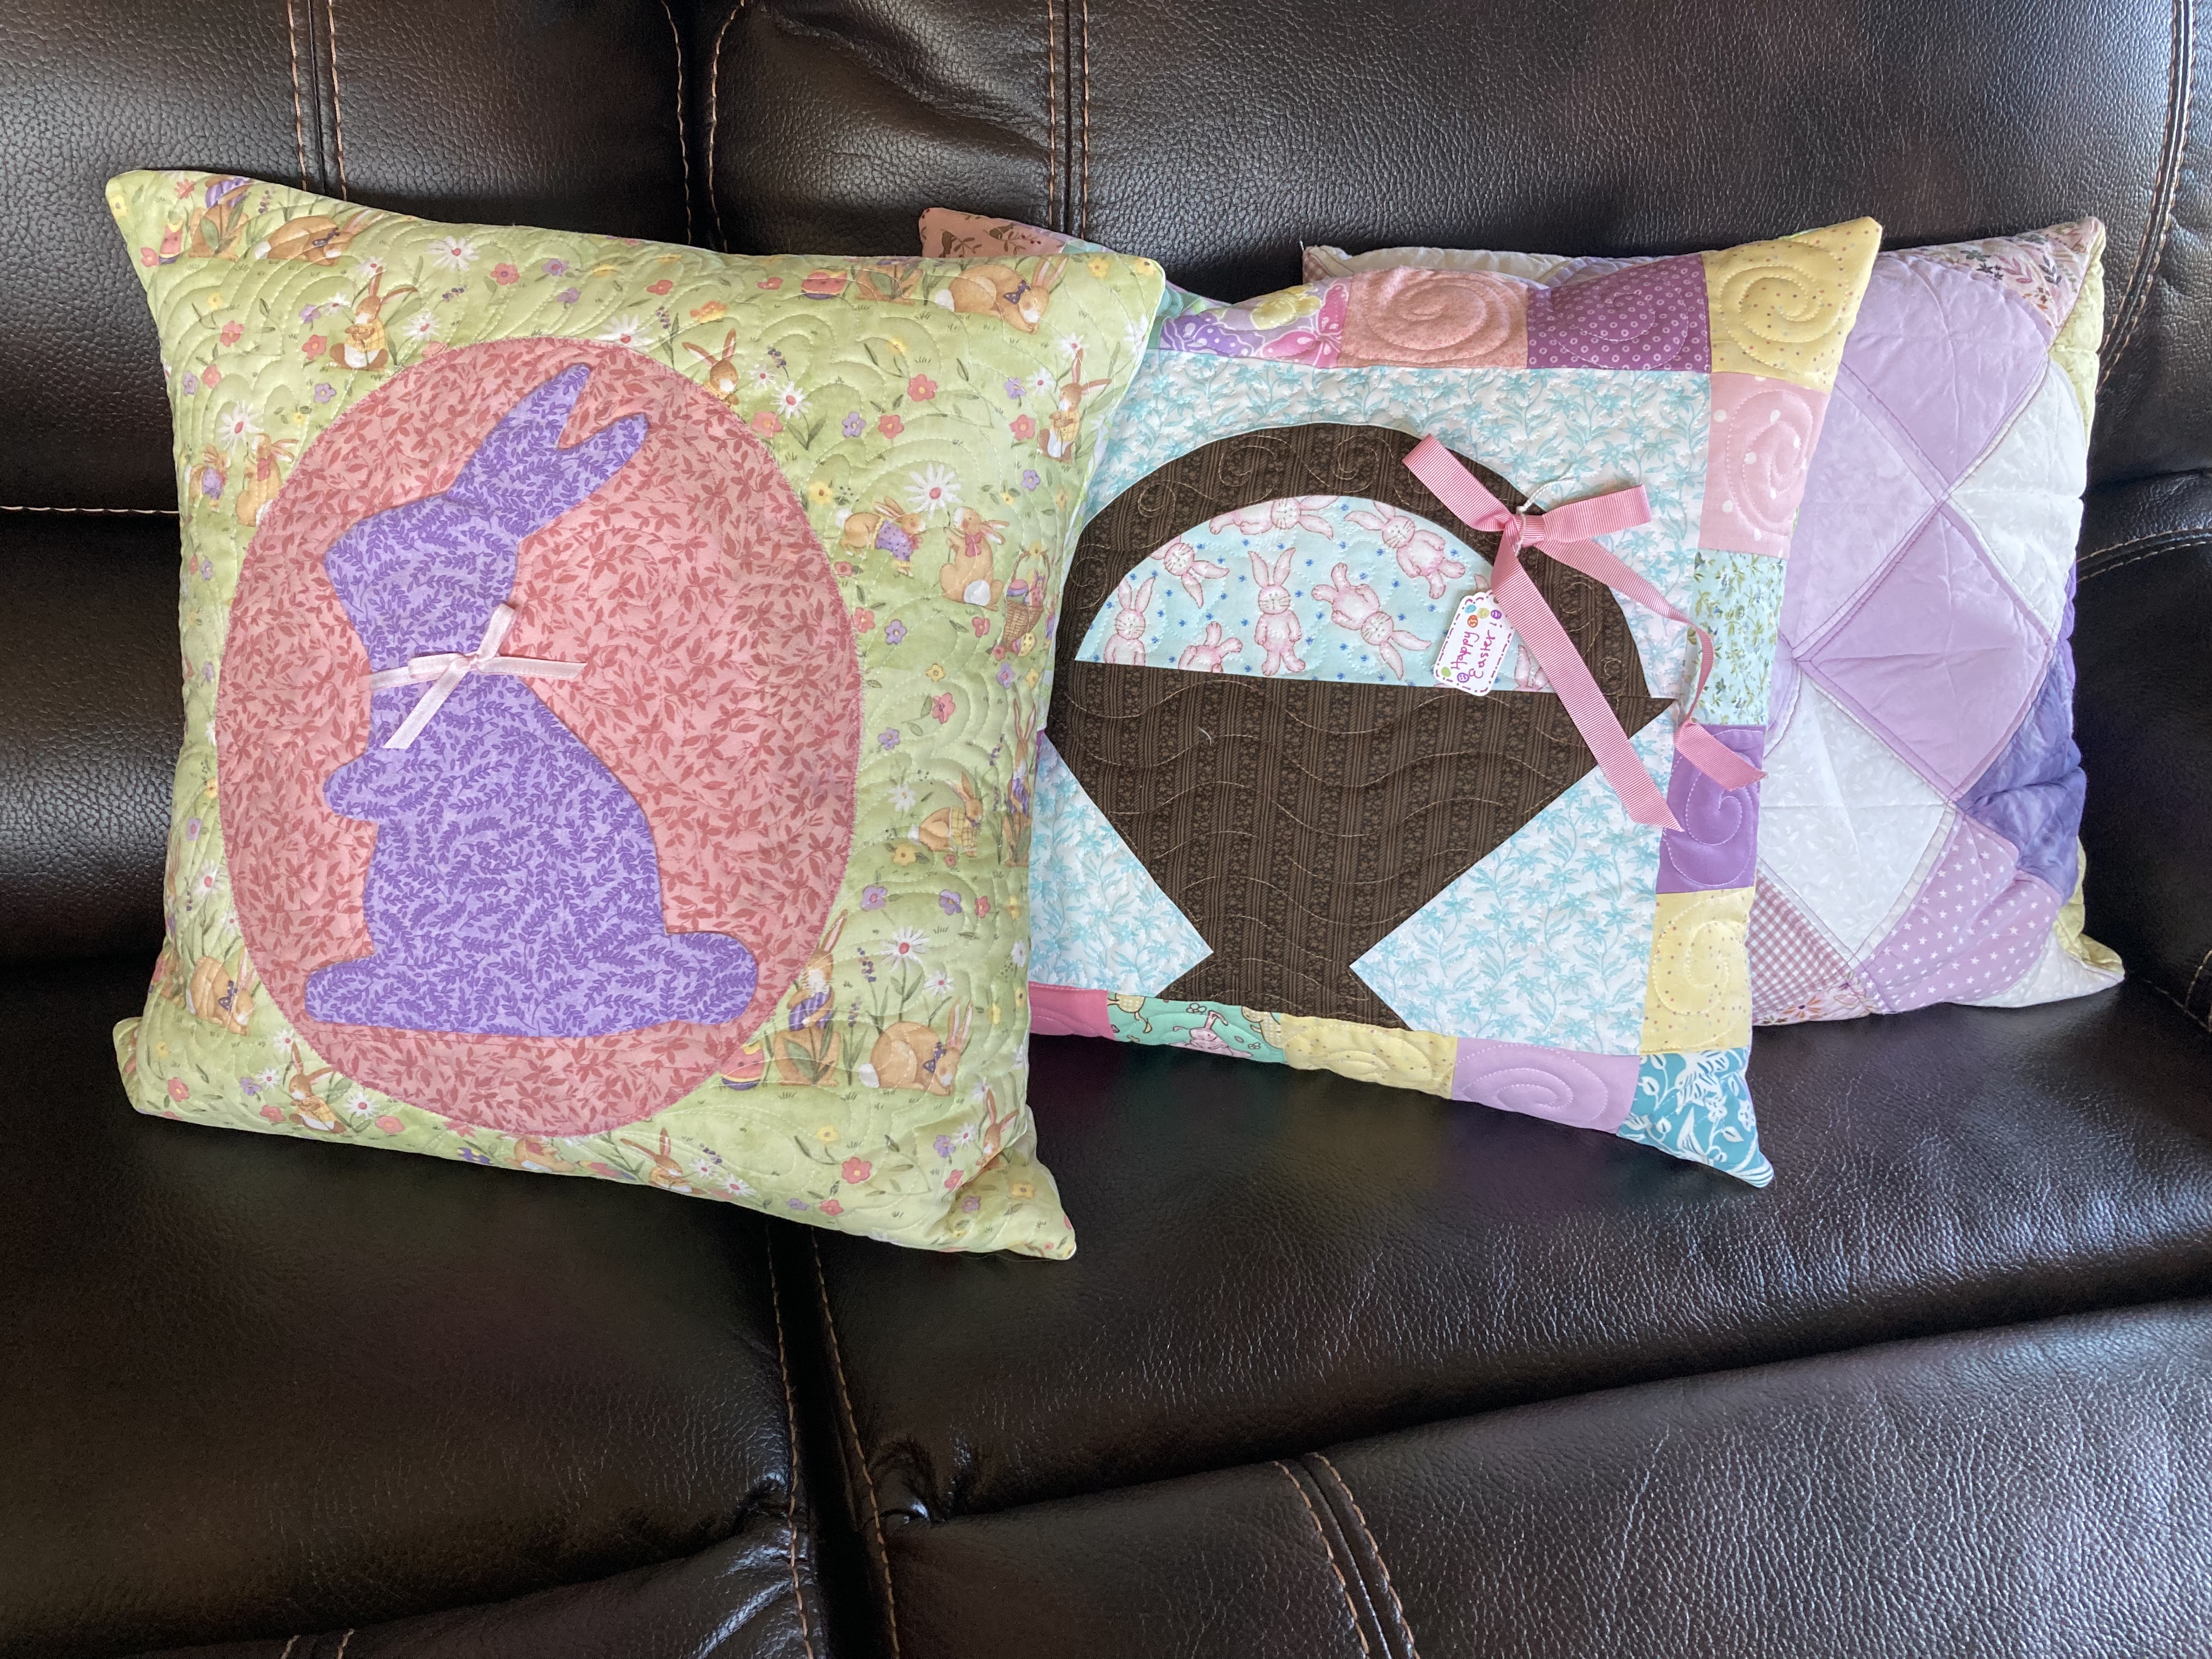
Bunnies have been multiplying around here.

I made this cute mini for my friend Donna.

Using the paint program on the computer, I made a couple designs.  I drew the squares so I could just measure the boxes, add a seam allowance and then could also measure for the pieces to snowball the corners to create the shapes.


But for this bunny with up ears, I decided to just do applique and when I cut him out, I rounded the corners and added about 1/4 inch for seam allowance.  He comes out to be about 11" unfinished.  I have an oval frame so used it for a template.  I made few extras to share.


I used the applique method where you sew your bunny to a piece of interfacing with right sides together and sew all the way around and then just make a cut in the interfacing to pull the right side out.  (Note if you you fusible interfacing, do not iron until you're ready to place on your background.)  Then, my friend, Trish, showed me how to stitch it to the background, using an invisible stitch.  If the interfacing is showing, you roll it under before stitching down.  I'm terrible at hand sewing but after doing a few of these, I got better at it.  
For this one, the rectangle is 8 1/2 x 11" (actually cut it a little bigger and then trim to that size after appliquing).  The little squares are 2 1/2", so I did scant seams on the 5 side squares so they would fit. 


  For this one I did the oval background onto a 19" square, since I planned to make a pillow cover.  I didn't do the interfacing method around the oval, but just did a small zig zag stitch.  You can also see how I started doing some free motion quilting with feathery shapes and then just echoed and echoed all the way out.


Bunnies are not really in the Easter Story, but I figure there may have been one around on that Easter morning.


If you like the basket pillow, I have a tutorial here.

This pillow cover fits the Charm Square Pillow that I made using a tutorial from the Missouri Star Quilt Company.  You can see the link in the photo below.  It's nice to have different pillow covers and then you don't have to store a bunch of pillows for different holidays.


Wednesday, March 15, 2023

Irish Chain Shamrock Mini


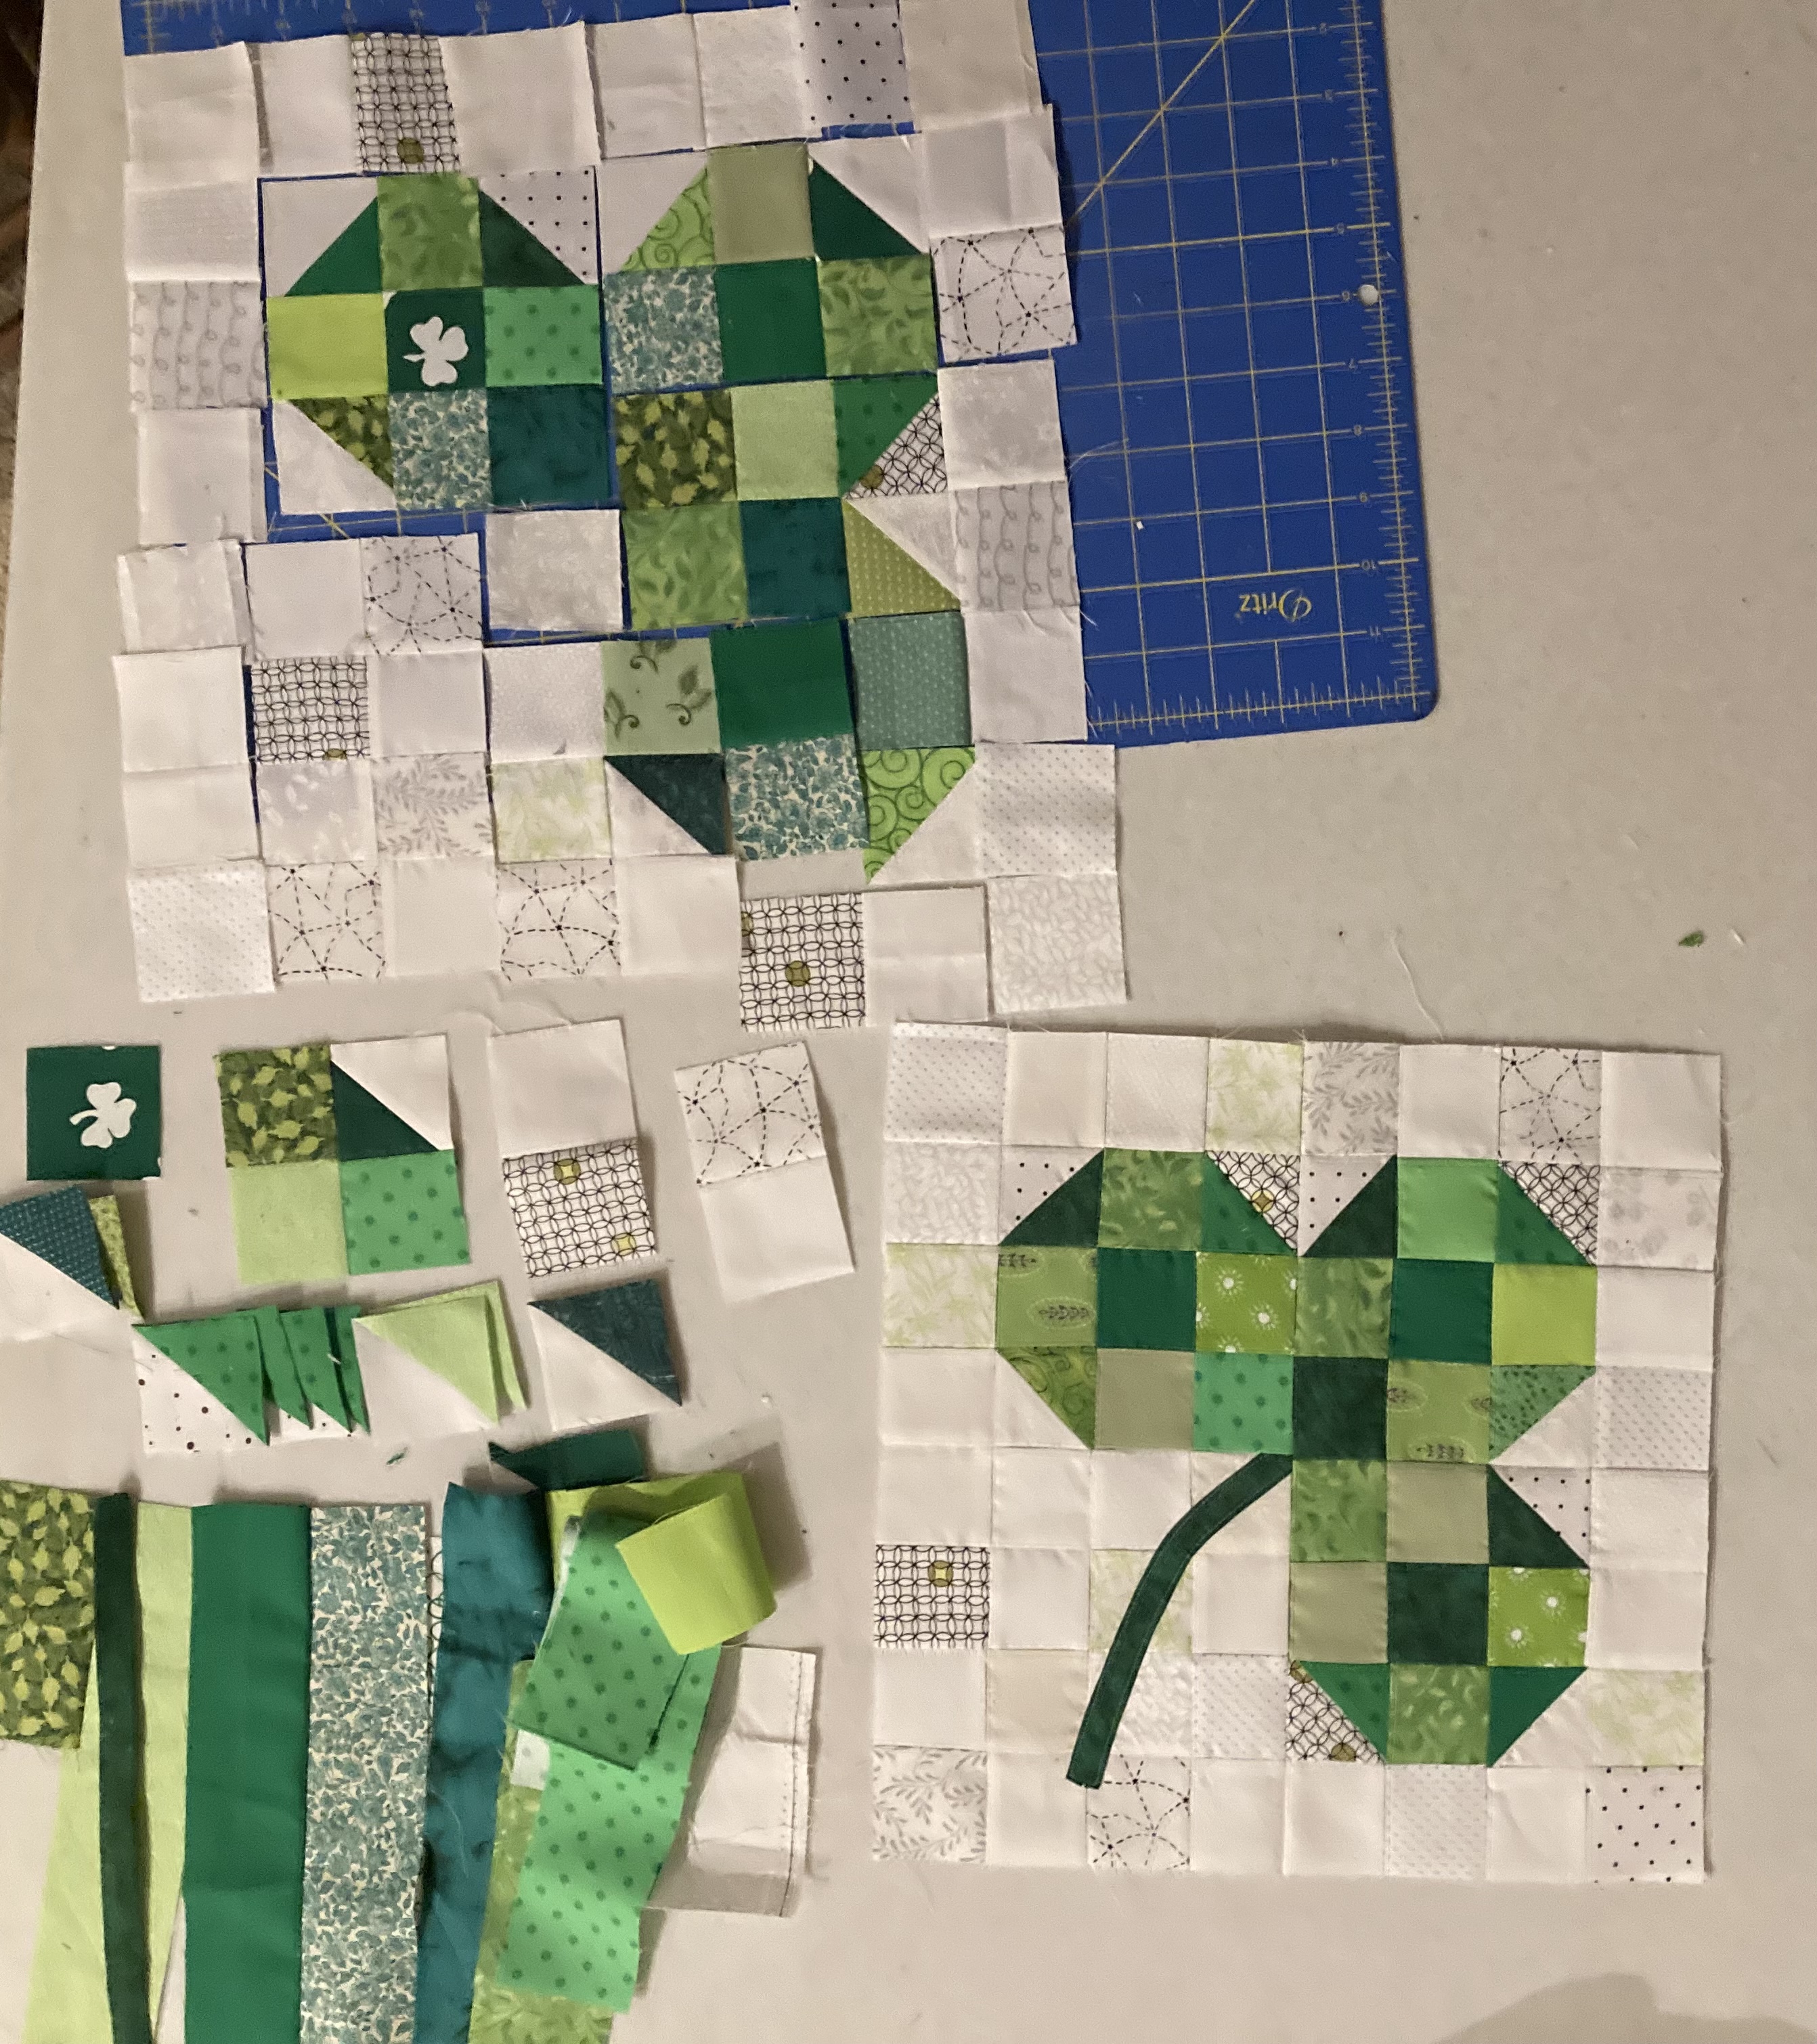
Finished up this little mini just in time for St. Patrick's Day.  I got this idea from my friend, Trish, who made one last year.  (You can see the triple Irish chain in process in the background.  I think it'll get done next year for sure.)


Here's a Tutorial in case you want to make one too.

Cutting Instructions
Cut: 
1. 2 inch strips to make the chains.  Total of 2" x 72" of dark green and 2" x 40" for the coordinating lighter green strip.
2.  (4) 3 1/2" green squares
3.  (3) 2 3/4" green squares
4.  (1) 2 3/4" background square
5.  (8) 2 x 3 1/2" light background rectangles
6.  (4) 2 x 5" rectangles
7.  (5) 1 3/8" squares of background light fabric and then cut diagonally once.


Make Your Center Shamrock block


You can see how snowballing the corners will make the shamrock shape

Lay your small triangles, right sides together as shown and then press open and trim square to be 2 3/4".  Note the black arrows how to lay the little triangles onto the square.  Also note in the picture, the red square shows that when you lay the triangle down the corners will stick out from the background a bit.  For my stem I used my bias tape maker but you could just cut a one inch strip and press the sides in 1/4" on each side.  When you press it, you can curve it a bit if you want to.

Next you will lay out all the parts and sew into sections
2" squares make the chains except the corner squares are 3 1/2" and the verticle light longer ones are
 3 1/2 x 2"


As you sew the pieces into sections, keep in mind how you will sew the sections together

This makes a 17" block (unfinished)

Quilt and Bind as desired.  Trying out some of my quilting software but then added some free motion on the shamrock and a bit around as you can see below

Wishing you a Lucky Year!


Monday, March 13, 2023

Shamrock Accessorizing: Pillows and Long Table Runner


I made these pillows using my tutorial for the shamrock block. 


I did some swirl free motion quilting on my domestic sewing machine.


 Add 2" strips for borders which gives you a 15 1/2" block.  

For the back of the pillow cut two pieces.  Cut (2) 15 1/2 x 10".    Also cut (1) strip coordinating fabric 15 1/2 x 2"   Hem one 15 1/2" side by folding over 1/2" and stitch down.  On the other backing piece sew the coordinating piece (which you have folded in half lengthwise and pressed) and sew to edge of the outside piece with right sides together.  Sew these as shown  to the pillow front, with right sides together and then flip right sides out through the opening.  Sorry no picture but ask if you need more explanation.  Note:  I also made my own pillow by sewing two 15 1/2" squares together leaving a 4" inch opening.  Turn right side out and fill with little scraps of batting and trimmings and some polyester fill and then stitch the opening closed.

Here's a long runner I made with six shamrock blocks.  I made a colorful border by adding 2" squares of green which alternated with white 2" squares, on top and bottom.  I did this before sewing the blocks together.  Of course, the end blocks also have a side border also.


My new quilting program has a shamrock and a leaf pantograph, so was able to use that for the quilting.


Here are some shamrock blocks.  The blocks are 12 1/2"

Here's the screen for the shamrock pantograph

Hope you make something fun for St. Patrick's Day and don't forget to wear green!


Tuesday, February 28, 2023

Top O’ the Mornin’ and a Scrappy Shamrock Tutorial

UPDATE:  Here's a couple projects I made with the shamrock block tutorial.  Follow this Link if you want a little more information on these projects.


I wish each holiday could last at least a couple of months as I love to decorate in the holiday colors but it's a little annoying they change so quickly.  Still, I love to get out the bin and start putting out the new decorations (and on the plus side, things get dusted, lol).  
I finished up the quilting and binding on these small quilts.  The hand quilted one is best but of course a lot more time consuming so don't see a lot of hand quilting in my future.
Purples always pretty with greens
Glad I got the shamrock wreath completed from last year.

Old Pillows.  I don't like the dullish greens on that one on the left.  Definitely need some brights and darks for proper St. Patrick's day colors!

My friend Faith asked me to make a tutorial for a shamrock block so am going to start a scrappy one


So, gather some scrappy whites and greens.  You can cut 2-inch strips of white and green fabrics or with small scraps can cut two-inch squares.  If you have strips, you can sew them together with a plan.  In the picture below you will see I have laid out the pieces (some of which I had sewn in strips and then cut into 2 " sections) See below for making the half square triangles (HSTs)


Made with two-inch squares and two-inch half square triangles (HSTs) Lay them all out and start sewing into 4 patches.  Be sure to square up each 4 patches to be 3 1/2 inches.  As you sew them together, always continue to square up.  (A 9 patch will be 5" square; A 16 patch will be 6 1/2" square, etc.)

Make 2" HSTs with your favorite method or here is my method below
  

Cut 3 3/8' squares of background and green fabrics but if your scraps are smaller, you can also cut 2 3/8" squares

Place the background and green squares together.  For the larger square, sew around the perimeter and then slice diagonally twice to make 4 HSTs.  For the smaller square you can just slice diagonally once and then sew those edges together as shown, and you will get two HSTs.  Press open and square up to 2 inches.

To make the stem, you can use your favorite applique method or here's what I did.  I used my bias tape maker.  If you don't have one just cut a strip (on the bias preferably but doesn't have to be).  I think mine is 7" long x 1".  Fold in each long edge about 1/4" and also fold in the bottom and press.  You can press a bit of a curve to it and then place it on your 16 patch of background and stitch down.  I put the top edge so it will be within the seam line.

This makes a 12" finished block.  If you wanted to make it without the perimeter of white squares, it would be a 9 1/2" block (unfinished).  If you made this block using 2 1/2" squares, it would be 12 1/2 unfinished without the extra white squares around the perimeter or 15 1/2 with the extra rows of white blocks.


I'll update later with my completed runner that I'm hoping to get completed soon.  Also planning to make a mini like the one my friend Trish made last year and I'll have some instructions to share also.

Here's a preview


Heart Projects for February

Finally getting back to some blogging and wanted to feature some Valentines.
I finished this one last year and love it still

I started a new mini but will need to finish next year.
I finished this one and sent it off to my friend in Nevada (guess I didn't get a picture with the binding)


I completed the quilting and binding on this one this year.  I got the program so my quilting machine will quilt automatically.  I'm planning to offer my service for pantographs $25- $75 depending on the size.


I also used the quilting software to quilt the heart design pantograph onto this long runner and got the binding on

Here's a couple very short videos of the machine working.


One of my Quilting Group friends had a birthday.  I made two toppers, one bright and one in calicos, so she could choose.


I designed this large block that would be a cute quilt too.  I didn't actually make the quilts but just used cut and paste on the single blocks to see how it would look


My plan was to offer a tutorial but since it's the last day of February I'm going to go ahead and post without the instructions but will come back to it when I find where I wrote down the details.
For the heart cut:


Here's a precious little Valentine

Hope you enjoy the last day of February!

St. Paddy’s Day Hats with some Cutting Instructions

I finished a few gifts with my leprechan hat pattern I created.  This could also be a pilgrim hat for Thanksgiving and could probably alter ...